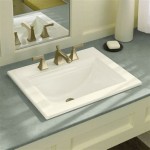
How To Attach Bathroom Sink Cabinet: A Step-by-Step Guide
Installing a bathroom sink cabinet can seem like a daunting task, but with the right preparation and tools, it can be a straightforward process. Here's a comprehensive guide to help you navigate the installation, ensuring a sturdy and functional result.
Materials and Tools Required:
- Bathroom sink cabinet
- Level
- Screwdriver or drill
- Screws or bolts
- Plumber's putty or silicone sealant
- Measuring tape
- Pencil or marker
Step 1: Position the Vanity
Begin by placing the bathroom sink cabinet in its designated location. Use a level to ensure that the cabinet is level both from side to side and front to back. Adjust the legs or feet of the cabinet as needed to achieve a stable and balanced position.
Step 2: Secure the Cabinet to the Wall
Once the cabinet is level, secure it to the wall studs using screws or bolts. If the wall is made of drywall, use anchors to provide additional support. Drive the screws or bolts through the holes provided on the back of the cabinet and into the wall studs. Ensure that the cabinet is securely attached to the wall to prevent movement or instability.
Step 3: Connect the Plumbing
Connect the sink's drainpipe to the cabinet's drain hole. Apply a bead of plumber's putty or silicone sealant around the base of the drain to create a watertight seal. Tighten the drainpipe according to the manufacturer's instructions.
Step 4: Install the Sink
Place the sink on the countertop and center it over the drain hole. Apply a thin layer of plumber's putty or silicone sealant to the rim of the sink where it will contact the countertop. Gently lower the sink into place, ensuring that it fits snugly and is level. Wipe away any excess sealant.
Step 5: Secure the Sink to the Countertop
Secure the sink to the countertop using mounting clips or screws that are typically included with the sink. Tighten the clips or screws until the sink is securely fastened to the countertop. Avoid overtightening, as this could damage the sink or countertop.
Step 6: Connect the Faucet and Handles
Connect the faucet and handles to the sink by following the manufacturer's instructions. Tighten the nuts and gaskets securely to ensure a watertight seal. Turn on the water supply and check for any leaks.
Step 7: Install the Doors and Drawer Fronts
Align the doors and drawer fronts with the cabinet and insert the hinges or drawer slides. Secure them in place using screws or fasteners. Make sure the doors and drawers open and close smoothly.
Step 8: Final Checks and Adjustments
Once all components are installed, inspect the sink cabinet for any loose connections or leaks. Tighten any screws or bolts as needed. Double-check the level of the cabinet and sink to ensure stability and proper drainage. Congratulations! You have successfully attached your bathroom sink cabinet.
Tips:

How To Install A Bathroom Vanity

How To Install A Bathroom Vanity

How To Fit A Vanity Unit Big Bathroom

How To Install Bathroom Vanity Units That Make Your Friends Jealous

How To Install Or Remove A Bathroom Vanity Homeserve Usa


How To Replace Install A Bathroom Vanity And Sink Small Vanities Diy Trendy

How To Install Fit A Bathroom Sink Vanity Unit Tap And Waste Plumbing For Diy Enthusiasts

Solution Sunday Fixing Vanity Units To Plasterboard Walls Toggler Fixings

Diy Floating Bathroom Vanity Remodelando La Casa
Related Posts


