How to Change a Mixer Tap on a Bathroom Sink
Replacing a bathroom sink mixer tap is not as daunting as it might seem. With the right tools and a little know-how, you can tackle this task in a few hours. This step-by-step guide will walk you through the process and provide you with all the information you need to get the job done efficiently.
1. Gathering Materials and Tools
Before you begin, gather all the necessary tools and materials:
- New mixer tap
- Adjustable wrench or spanner
- Adjustable pliers
- Bucket or bowl
- Cloths or rags
- Teflon tape or plumber's putty
- Toothbrush or small brush
2. Shut Off the Water Supply
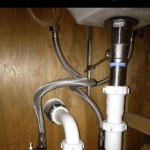
Locate the water supply valves under the sink. Close both the hot and cold water valves to turn off the water supply to the tap.
3. Release Residual Water
Open the hot and cold taps on the sink to release any remaining water from the lines and tap.
4. Disconnect the Supply Hoses
Use the adjustable wrench to loosen and disconnect the supply hoses from the tap. Place a bucket or bowl under the hoses to catch any dripping water.
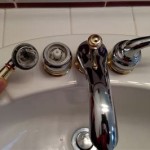
5. Remove the Old Tap
Locate the bolts or nuts securing the tap to the sink. Use the adjustable wrench to loosen and remove the nuts or bolts. Remove the old tap by gently lifting it out of place.
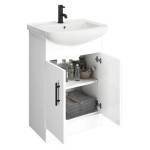
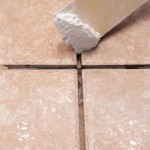
6. Clean the Base of the Sink
Use a toothbrush or small brush to clean the base of the sink where the new tap will be installed. This will ensure a good seal and prevent leaks.
7. Apply Tape or Putty
Wrap Teflon tape or apply plumber's putty around the base of the tap's body. This will create a watertight seal between the tap and the sink.
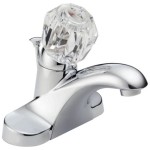
8. Install the New Tap
Place the new tap in the sink and align the holes. Insert the bolts or nuts and tighten them using the adjustable wrench, taking care not to overtighten.
9. Reconnect the Supply Hoses
Reconnect the supply hoses to the corresponding hot and cold water valves on the new tap. Hand-tighten the hoses as much as possible, then use the adjustable wrench to give them an extra quarter turn.
10. Turn On Water Supply
Go back under the sink and slowly turn on the water supply valves. Check for any leaks around the base of the tap or the supply hoses. Use the adjustable wrench to tighten any connections if necessary.
11. Test the Tap
Turn on the hot and cold taps to check that water is flowing smoothly and evenly. Adjust the handles to control the temperature and pressure of the water as desired.
Congratulations! You have successfully replaced your bathroom sink mixer tap. If you encounter any difficulties or leaks during the process, do not hesitate to contact a professional plumber for assistance. Regular maintenance, such as cleaning and lubricating the tap, will help extend its lifespan and keep it working smoothly for years to come.

How To Easily Replace Basin Taps Step By

How To Change Bathroom Taps Everything You Need Know

How To Change A Washer On Mixer Tap Living By Homeserve

Single Lever Mono Basin Flow Cartridge Maintenance And Replacement

How To Change Or Replace Single Bathroom Basin Tap

Steps For How To Change A Mixer Tap Bathware Direct

How To Install Basin Taps Replacing A Bathroom Sink Tap

Bath Shower Mixer Diverter Maintenance And Replacement
Fitting A Bathroom Basin Tap The Diy

How To Fit A Basin Mixer Tap Victoriaplum Com