How to Change Bathroom Floor: A Step-by-Step Guide
Renovating your bathroom floor can transform the look of your entire space. Whether you're tired of outdated tiles or seeking a more luxurious feel, changing your bathroom floor is a project that you can accomplish yourself with the right planning and tools. Here's a step-by-step guide to help you navigate the process smoothly:
1. Preparation
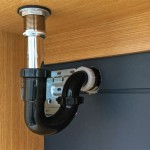
Before starting, clear the bathroom of all fixtures, furniture, and accessories. Protect any remaining surfaces, such as walls, countertops, and vanities, with drop cloths or plastic sheeting. Turn off the water supply and remove any existing flooring, including tiles, vinyl, or carpet. Ensure the subfloor is clean and level before proceeding.
2. Install Underlayment
Underlayment provides a smooth, moisture-resistant base for your new flooring. Roll out the underlayment and secure it to the subfloor using tape or staples. Ensure there are no gaps or overlaps, and trim any excess material around the edges.
3. Lay the Flooring
Depending on the type of flooring you choose, the installation process will vary. For ceramic or porcelain tiles, apply thin-set mortar to the underlayment and press the tiles into place. Use spacers to maintain even gaps between tiles and a level. For luxury vinyl planks or laminate flooring, simply snap or click the planks together over the underlayment. Make sure to stagger the joints for stability.
4. Grout and Seal (for Tiles)
Once the tiles are laid, apply grout to the joints using a grout float. Smooth the grout into place and remove any excess. Allow the grout to dry according to the manufacturer's instructions. Once dry, seal the grout and tiles using a penetrating sealer to protect them from moisture and stains.
5. Trim and Moldings
Finish the edges of your new flooring by installing baseboards or quarter-round moldings. These moldings will cover the expansion gap between the flooring and the walls, enhancing the aesthetic appeal. Secure the moldings using nails, screws, or adhesive.
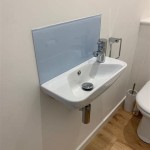
6. Reinstall Fixtures
Once the flooring is complete, reinstall the bathroom fixtures, furniture, and accessories. Turn on the water supply and check for any leaks. Enjoy your newly renovated bathroom floor!

How Can I Change The Tile Floor In My Bathroom Miracle Method Surface Refinishing Blog

How To Remove A Tile Floor

How To Upgrade Bathroom Tile Without Replacing

How To Upgrade Your Bathroom Nitco Blog

How To Remove Tile Flooring Yourself With Tips And Tricks Removal Ceramic Floor

Bathroom Flooring Ideas The Home Depot

Bathroom Flooring Ideas The Home Depot

How To Upgrade Bathroom Tile Without Replacing

The Easiest Way To Update Your Bathroom Floor Shaw Versalock Vinyl Plank Flooring Reinvented Delaware

Quick Change Replacing The Bathroom Toilet And Flooring At Same Time Midmod Midwest
Related Posts