How to Change a Delta Bathroom Faucet Cartridge
Maintaining a bathroom faucet is essential for ensuring proper water flow and preventing leaks. Replacing a Delta bathroom faucet cartridge is a relatively simple task that can help resolve common issues, such as dripping or low water pressure. This guide provides step-by-step instructions on how to change a Delta bathroom faucet cartridge, highlighting the crucial aspects for a successful repair.
Understanding the Parts of a Delta Bathroom Faucet
Before beginning the cartridge replacement process, it is important to familiarize yourself with the parts of a Delta bathroom faucet. The key components include the handle, escutcheon plate, cartridge, and aerator. Understanding these components ensures efficient and accurate disassembly and reassembly.
Gathering Necessary Tools and Materials
To successfully change a Delta bathroom faucet cartridge, you will need the following tools and materials: - Adjustable wrench - Phillips head screwdriver - New Delta faucet cartridge - Lubricating grease - Rags for cleaning
Step-by-Step Instructions
Step 1: Turn Off Water Supply
Before starting any work, turn off the water supply to the faucet by locating the shut-off valves beneath the sink or behind the access panel.
Step 2: Remove Handle and Escutcheon Plate
Using a Phillips head screwdriver, remove the screw securing the handle to the escutcheon plate. Gently lift the handle upwards to detach it. Then, use a flat-head screwdriver or a putty knife to carefully pry off the escutcheon plate.
Step 3: Extract Cartridge
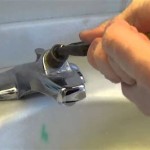
Using an adjustable wrench, gently loosen the retaining nut holding the cartridge in place. Grip the cartridge by its base and pull it straight out of the faucet body.
Step 4: Inspect and Lubricate
Inspect the old cartridge for any damage or debris. Apply a small amount of lubricating grease to the new cartridge's O-rings.
Step 5: Insert New Cartridge
Align the new cartridge with the faucet body and insert it straight in until it is fully seated. Hand-tighten the retaining nut securely.
Step 6: Reassemble Handle and Escutcheon Plate
Position the escutcheon plate over the faucet body and gently press it into place. Insert the handle onto the stem and secure it with the screw.
Step 7: Turn On Water Supply and Test
Turn on the water supply and check for any leaks. Operate the faucet handle to ensure smooth operation and proper water flow.
Conclusion
Replacing a Delta bathroom faucet cartridge is a straightforward task that can be completed in a few simple steps. By understanding the essential aspects of the faucet's components and following the step-by-step instructions carefully, you can successfully repair a dripping or malfunctioning faucet, restoring optimal water flow and functionality to your bathroom.

How To Replace The Cartridge In A Single Handle Delta Faucet Repair

How To Replace A Delta Shower Cartridge Do It Yourself

Delta Faucet Cartridge Repair

How To Replace Leaky Cartridges In A Bathroom Faucet Repair
Delta Shower Handle Cartridge Replacement Ifixit Repair Guide
Delta Shower Handle Cartridge Replacement Ifixit Repair Guide
Delta Shower Handle Cartridge Replacement Ifixit Repair Guide

How To Fix A Leaky Bathtub Faucet Delta Shower Cartridge L Replace

How To Install A Shower Valve Cartridge With Photos Clean The Bonnet Nut And Threads Then Delta Kitchen Faucet Repair

Delta Plastic Tub Shower Cartridge Repair Kit In The Faucet Kits Components Department At Com
Related Posts


