How To Change Out A Delta Bathroom Faucet
Understanding how to change a Delta bathroom faucet is essential for maintaining your bathroom's functionality and aesthetics. Whether you're a seasoned DIYer or just starting out, this essential guide will guide you through the key aspects involved in replacing your Delta faucet, ensuring a flawless and efficient experience.
Essential Considerations:
- Identifying the Issue: Correctly diagnosing the problem with your faucet is crucial. Common issues include leaks, reduced water flow, or difficulty adjusting the temperature.
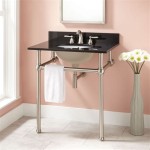
- Choosing the Right Replacement: Select a compatible Delta faucet model that matches your sink and setup. Consider factors such as finish, handle style, and flow rate.
- Gathering Tools and Materials: Assemble the necessary tools, including a crescent wrench, adjustable wrench, pliers, and plumber's putty.
- Safety Precautions: Turn off the water supply and drain any remaining water from the faucet before starting.
Step-by-Step Guide:
This detailed guide will lead you through each step of the faucet replacement process:
- Remove the Old Faucet: Disconnect the supply lines, remove the handle, and unscrew the mounting nut to detach the faucet from the sink.
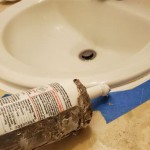
- Clean the Sink Surface: Remove any old plumber's putty and clean the sink surface thoroughly.
- Install Plumber's Putty: Apply a ring of plumber's putty around the base of the new faucet.
- Position and Mount the New Faucet: Carefully position the new faucet and secure it by tightening the mounting nut.
- Attach the Supply Lines: Connect the hot and cold water supply lines to the appropriate valves on the faucet.
- Install the Handle: Slide the handle over the stem and secure it with the set screw.
- Turn on the Water: Turn on the water supply and check for any leaks.
- Finalize Installation: Adjust the handles for desired temperature and flow rate.
Troubleshooting Common Issues:
If you encounter any problems during installation, refer to these common troubleshooting tips:
- Leaks: Check for loose connections at the supply lines or mounting nut. Retighten if necessary.
- Low Water Pressure: Ensure the supply lines are fully open and the aerator on the faucet is clean.
- Difficulty Turning Handle: Check if the handle is properly installed. Lubricate the stem if needed.
Conclusion:
Replacing a Delta bathroom faucet is a straightforward task that can enhance your bathroom's functionality and style. By following these essential aspects, you can confidently tackle this project and enjoy a refreshed and leak-free faucet.

Tips Tricks Remove Delta 2 Handle 4 In Bathroom Sink Faucet With Bar 5 21 18

How To Replace A Two Handle Faucet Delta Blog

How To Install A Delta Widespread Bathroom Faucet

How To Fix Leaky Bathroom Handle Delta Faucet Model 4530 Series Hard Water

How To Rebuild A Delta Single Handle Faucet

How To Repair Leaking Dripping Delta Faucet Diyplumbing Serviceplumbing Tappplumbing

How To Install A Delta Tub Spout

Delta Bathroom Faucet Repair Seats And Springs Serramar Hoa

How To Install A Delta Widespread Bathroom Faucet With Sunken Valve

Learn How To Remove And Install Various Tub Spouts
Related Posts