Essential Aspects of Connecting Bathroom Taps
Installing bathroom taps is a fundamental aspect of bathroom plumbing, ensuring an efficient and seamless water supply system. However, the process can seem daunting for those unfamiliar with plumbing techniques. By understanding the essential aspects and complexities of tap installation, you can ensure a successful and trouble-free result.
Before embarking on the journey, it is crucial to gather the necessary tools, materials, and protective gear. These include adjustable wrenches, screwdrivers, PTFE tape, and safety glasses. Additionally, studying the manufacturer's instructions for your specific tap model is highly recommended.
Positioning and Marking the Taps
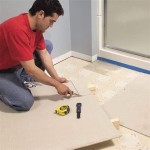
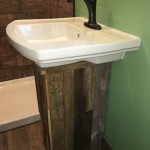
The first step is to determine the optimal location for your bathroom taps. Consider factors such as the size and shape of your sink, as well as the placement of any other fixtures or obstructions. Mark the position of the tap holes with a pencil to guide your drilling.
Drilling Guide Holes
Using a drill bit specified for the type of countertop or sink material, carefully drill guide holes for the tap connections. Ensure the holes are of the correct diameter and depth to accommodate the tap fittings.
Applying Sealant Tape
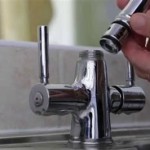
Before installing the taps, wrap PTFE tape around the threaded end of each tap connector. This tape acts as a sealant, preventing leaks by creating a watertight seal between the tap and the pipe.
Connecting the Taps
Carefully thread the tap connectors into the guide holes and use adjustable wrenches to tighten them securely. Avoid overtightening, as this can damage the fittings or the countertop.
Attaching the Water Supply Lines
Connect the water supply lines to the appropriate connectors on the taps. Typically, the red line indicates the hot water supply, while the blue line is for cold water.
Securing the Taps
Once the water supply lines are attached, locate the fixing nuts or screws that came with the taps. Tighten them firmly to secure the taps in place, ensuring stability and preventing movement.
Testing and Commissioning
After installation, turn on the water supply and carefully check for any leaks. If there are no leaks, your bathroom taps are successfully connected and ready for use.
By addressing these essential aspects of bathroom tap installation, you can ensure a secure, functional, and aesthetically pleasing water supply system for your bathroom.

How To Install A Bath Shower Mixer Tap User Guide

How To Install A Bath Shower Mixer Tap Cartridge User Guide

Removing And Installing Bathroom Faucets The Lazy Way Makely

How To Install A Bathroom Faucet Artsy Fartsy Mama

How To Install Shower Head From Bathroom Bunnings Work Community

How To Install A Widespread Bathroom Faucet Symmons Industries

How To Install Basin Taps Replacing A Bathroom Sink Tap

How To Install Bathroom Faucet The Complete Guide For You

How To Install A Health Faucet Toilet Bidet Sprayer Quickly 2024

How To Install A Tap Chamberlain
Related Posts