How to Cover a Bathroom Counter with Contact Paper
Contact paper is a budget-friendly and versatile material that can transform the look of a bathroom counter without the cost and hassle of a full renovation. It's a great option for covering outdated surfaces, adding a splash of color, or simply protecting the counter from wear and tear. This process is relatively simple and can be completed in a few hours with the right tools and preparation.
Prepare the Counter
Before applying contact paper, it's essential to prepare the surface for a smooth and even application. This involves cleaning and smoothing out any imperfections. Here's how:
- Clean the counter thoroughly: Remove any dirt, grime, soap residue, or other debris with a mild detergent and warm water. Allow the counter to dry completely before proceeding.
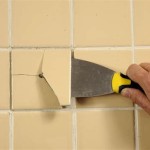
- Remove any existing adhesive: If there are remnants of old contact paper or tape, carefully remove them using a plastic scraper or a putty knife. Avoid using sharp objects that might scratch the counter surface.
- Sand down rough spots: If the counter surface has any bumps or uneven areas, lightly sand them down with fine-grit sandpaper to create a smoother surface for the contact paper to adhere to.
- Wipe away dust and debris: After sanding, use a damp cloth to wipe away any dust or debris remaining on the counter. Allow it to dry completely before proceeding.
Measure and Cut Contact Paper
Accurate measurement is crucial for a seamless and professional-looking application. Proper cutting ensures that the contact paper fits perfectly on the counter surface, leaving no gaps or overlaps.
- Measure the counter accurately: Using a measuring tape, carefully measure the length and width of the counter area you intend to cover. If possible, measure each section separately, especially if the counter has a sink or other features.
- Add seam allowance: To ensure a smooth transition between pieces of contact paper, add a small amount of overlap to each measurement. A quarter-inch seam allowance is usually sufficient.
- Cut contact paper: Use a ruler and a sharp utility knife to cut the contact paper to the measured dimensions. Be sure to make clean, straight cuts for a professional look.
- Practice on a test area: Before adhering the contact paper to the counter, practice on a small, inconspicuous area to ensure a smooth and bubble-free application.
Apply Contact Paper
The final stage involves applying the contact paper to the prepared counter surface. This process requires patience and precision, but following these steps can lead to a successful outcome:
- Peel a few inches of backing: Start at one end of the contact paper and peel back a few inches of the backing paper, exposing the adhesive side. This allows you to control the application process and avoid premature adhesion.
- Align the contact paper: Carefully align the contact paper with the edge of the counter, ensuring it's straight and level. Slowly press down on the exposed portion using a squeegee or a smooth-edged object.
- Remove air bubbles: As you press down on the contact paper, use the squeegee to smooth out any air bubbles or wrinkles that may form. Work from the center outwards to ensure even adhesion.
- Continue applying contact paper: Gradually peel back the backing paper, repeating the process of aligning, pressing, and smoothing the contact paper onto the counter surface.
- Trim edges: Once the contact paper is fully applied, use a utility knife to trim off any excess material along the edges of the counter.
After allowing the contact paper to fully adhere to the counter, it's essential to avoid placing any heavy objects on it for at least 24 hours to ensure a strong bond. With proper care and maintenance, a contact paper-covered bathroom counter can retain its fresh look for many years.

How To Do A Sy Stunning Granite Contact Paper Countertop Makeover

Transforming Bathroom Sink Diy With Marble Contact Paper

Marble Contact Paper Countertop 10 Months Later Anika S Diy Life

How To Do A Sy Stunning Granite Contact Paper Countertop Makeover

Marble Contact Paper Countertop 10 Months Later Anika S Diy Life

Diy Easy Bathroom Makeover Transformation Faux Marble Framed Mirror No Paint The Ann

How To Do A Sy Stunning Granite Contact Paper Countertop Makeover

How I Transformed My Ugly Ed Countertop For

How To Do A Sy Stunning Granite Contact Paper Countertop Makeover

Contact Paper Counter Top Bathroom Decor Countertop Countertops
Related Posts
