How To Disassemble Bathroom Sink Drain: A Comprehensive Guide
Maintaining a well-functioning bathroom sink drain is crucial for preventing clogs, leaks, and other plumbing issues. Disassembling the drain allows you to clean it thoroughly and replace any worn-out components. Here's a comprehensive guide on how to disassemble a bathroom sink drain:
Tools Required:
- Pliers
- Wrench
- Screwdriver
- Bucket or bowl
- Gloves
Steps:
- Turn Off Water Supply: Before starting, turn off the water supply valves beneath the sink.
- Remove Pop-Up Drain Stopper: If your sink has a pop-up drain stopper, remove it by pulling it up. In some cases, you may need to unscrew a small screw holding the stopper in place.
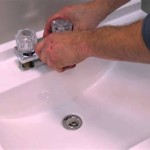
- Disconnect Drain Line: Locate the drain line connected to the bottom of the drain. Use a wrench to loosen the slip nut that secures the line. Be careful not to overtighten.
- Unscrew Tailpiece: The tailpiece is the vertical pipe connecting the drain to the trap. Use pliers or a wrench to unscrew the tailpiece from the drain.
- Remove Washer and Nut: Inside the drain assembly, you will find a rubber washer and a nut. Use a screwdriver to loosen the nut and remove both the nut and the washer.
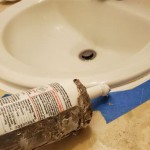
- Separate Drain Components: With the nut removed, you can now separate the drain components. Lift the drain strainer assembly, which includes the mesh screen, from the drain body.
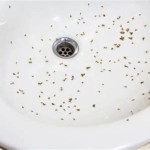
- Clean and Inspect: Clean all the drain components thoroughly with warm water and dish soap. Inspect them for any damage or wear and replace them if necessary.
- Reassemble: Reverse the steps to reassemble the drain. Start by placing the washer and nut back into the drain body. Hand-tighten the nut and use a screwdriver to further tighten it.
- Reconnect Components: Slide the strainer assembly back into place and secure it with the screw. Reconnect the tailpiece and tighten it with pliers or a wrench.
- Reconnect Drain Line: Reattach the drain line to the bottom of the drain and tighten the slip nut.
- Turn On Water Supply: Turn on the water supply valves and check for any leaks. If there are no leaks, your drain is successfully disassembled and reassembled.
Additional Tips:
- Wear gloves to protect your hands from dirt and grime.
- If you encounter any stubborn parts, apply penetrating oil to loosen them.
- Tighten all connections securely, but avoid overtightening.
- If you are unsure about any step, consult a qualified plumber.
- Regularly clean your bathroom sink drain to prevent future clogs and keep it functioning properly.

5 Natural Ways To Unclog A Bathroom Sink Hiller How

Sink Drain Replacement Bathroom

Bathroom Sink Popup And Stopper Problems

Quick Tip 26 Pop Up Stopper Sticks Misterfix It Com

How To Unclog A Bathroom Sink Hana S Happy Home

How To Remove A Bathroom Sink Stopper Take Out Pop Up Drain From

How To Replace A Pop Up Sink Drain Remove The Old Bathroom Stopper Repair

How To Remove A Sink Stopper Quick Easy Guide

How To Fix Or Maintain Your Sink S Pop Up Mechanism

How To Remove A Bathroom Sink Drain Ehow
Related Posts