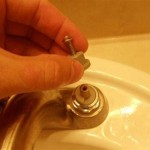
How to Fix a Dripping 2-Handle Delta Bathroom Faucet
A dripping bathroom faucet is not only annoying but can also waste water and increase your water bill. If you have a Delta 2-handle bathroom faucet that is dripping, you can often fix the problem yourself with a few simple tools and a little bit of time. This article will guide you through troubleshooting and fixing a dripping Delta 2-handle faucet.
1. Identify the Source of the Drip
The first step is to determine where the drip is coming from. There are two main culprits:
- Cartridge or Valve Seat: If the drip is coming from the spout when the faucet is off, the problem is likely with the cartridge or valve seat. The cartridge is a replaceable part within the faucet that controls water flow. The valve seat forms a seal around the cartridge to prevent leaks.
- Stem O-ring: If the drip is happening when the faucet is on, the issue might be with the stem O-ring. The stem O-ring is a small rubber seal that prevents water from leaking around the stem, which connects the handle to the cartridge.
To pinpoint the issue, carefully observe the faucet while it is dripping. Note the location of the drip and if it occurs when the faucet is on or off.
2. Tools and Materials
Before you begin the repair, gather the following tools and materials:
- Adjustable wrench
- Channel-lock pliers
- Phillips screwdriver
- Flat-head screwdriver
- Replacement cartridge (if necessary)
- Replacement O-ring (if necessary)
- Teflon tape
- Basin wrench (optional)
- Work gloves
- Towel
3. Repairing a Dripping Cartridge or Valve Seat
If the drip is coming from the spout when the faucet is off, here's how to repair the cartridge or valve seat:
- Turn off the water supply. Locate the shut-off valve for the faucet and turn it off. Be sure to turn the handle all the way to the left to completely stop the water flow.
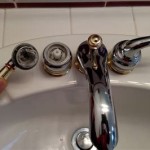
- Remove the handle. Unscrew the handle cap and remove the handle. You may need to use a channel-lock pliers or adjustable wrench to remove the handle if it is stuck.
- Remove the bonnet. The bonnet is a small metal cap located under the handle. It usually has a Phillips head screw holding it in place. Remove the screw and then unscrew the bonnet.
- Remove the cartridge. The cartridge is located under the bonnet. Use a channel-lock pliers or adjustable wrench to remove the cartridge. You may need to gently twist and pull it out. The cartridge might look like a small cylinder or a cylindrical stem with a spring inside, depending on the Delta faucet model.
- Inspect the valve seat. The valve seat is located around the base of the cartridge. Look for any scratches, cracks, or mineral buildup. If there are any issues with the valve seat, it may need to be replaced.
- Inspect and replace the cartridge. If the cartridge has any debris or mineral buildup, try cleaning it with a toothbrush and vinegar. If the cartridge is worn out, cracked, or unable to be cleaned, it needs to be replaced.
- Reassemble the faucet. Once the cartridge is repaired or replaced, reassemble the faucet in reverse order. Make sure to apply a thin layer of Teflon tape to the threads of the bonnet to seal the connection.
- Turn on the water and test. Turn on the water supply and check for leaks. If the faucet is still dripping, you might need to adjust the valve seat or replace it.
4. Repairing a Dripping Stem O-ring
If the drip is happening when the faucet is on, the problem is likely with the stem O-ring. Follow these steps to replace it:
- Turn off the water supply. Locate the shut-off valve for the faucet and turn it off. Be sure to turn the handle all the way to the left to completely stop the water flow.
- Remove the handle. Unscrew the handle cap and remove the handle. You may need to use a channel-lock pliers or adjustable wrench to remove the handle if it is stuck.
- Remove the stem. The stem is located directly under the handle. It may be attached by a hex nut. Use a wrench or adjustable pliers to unscrew the nut and remove the stem.
- Remove the old O-ring. The O-ring is located on the stem. It is typically a small rubber ring. Use a small screwdriver or needle-nose pliers to remove the old O-ring. It may be necessary to pull it off with your fingers.
- Install a new O-ring. Place the new O-ring onto the stem in the same position as the old one. Ensure the O-ring is securely seated.
- Reassemble the faucet. Reassemble the faucet in reverse order. Ensure the stem is fully tightened with the hex nut.
- Turn on the water and test. Turn on the water supply and check for leaks. If the faucet is still dripping, you might need to replace the O-ring, check the cartridge for any debris, or consider replacing the cartridge itself.
If you are not comfortable with these repairs, or if the drip persists after following these steps, it is best to contact a qualified plumber.

How To Fix Leaky Bathroom Handle Delta Faucet Model 4530 Series Hard Water

How To Fix A Leaky Delta Two Handle Faucet

Simple Ways To Fix A Leaky Delta Bathroom Sink Faucet

How To Fix A Leaky Delta Style Bathroom Faucet

Simple Ways To Fix A Leaky Delta Bathroom Sink Faucet

How To Fix A Double Handle Delta Kitchen Sink Faucet Leak

Simple Ways To Fix A Leaky Delta Bathroom Sink Faucet

How To Repair Leaking Dripping Delta Faucet Diyplumbing Serviceplumbing Tappplumbing

How To Repair Your Delta 2 Handle Faucet

Simple Ways To Fix A Leaky Delta Bathroom Sink Faucet
Related Posts
