How to Fix a Dripping Delta Bathroom Sink Faucet
A dripping bathroom sink faucet can be annoying,浪费水, and potentially lead to damage if not fixed promptly. If you're dealing with this issue, don't worry – it's a common problem that can be easily resolved with the right tools and a bit of know-how.
Materials Required
- Flathead screwdriver
- Phillips head screwdriver
- Wrench
- Replacement cartridge
- Plumber's putty
- Rags or towels
Step-by-Step Instructions
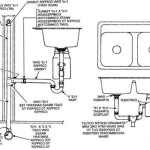
1. Turn Off the Water Supply
Locate the shut-off valves under the sink and turn them clockwise to关闭供水. This will prevent water from flowing out of the faucet while you work.2. Remove the Faucet Handle
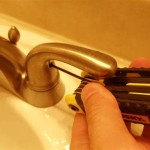
用平头螺丝刀撬开手柄上的盖子. Once the cap is removed, you'll see a screw. Use a Phillips head screwdriver to loosen the screw and pull the handle straight up to remove it.3. Remove the Aerator
The aerator is the small, mesh screen attached to the tip of the faucet spout. Wrap a rag around its base and unscrew it by turning it counterclockwise.4. Unscrew the Cartridge Nut
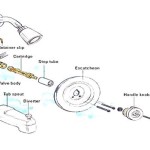
Use a wrench to loosen the large nut that holds the cartridge in place. The nut is located directly below the handle assembly.5. Pull Out the Cartridge
Once the nut is loose, pull the cartridge straight out of the faucet body. Inspect the cartridge for any signs of damage or wear.6. Install the New Cartridge
Align the new cartridge with the faucet body and insert it into the opening. Hand-tighten the cartridge nut as much as possible.7. Reassemble the Faucet
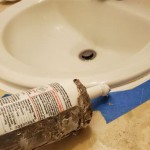
Insert the aerator back onto the faucet spout and tighten it by turning it clockwise. Replace the faucet handle by aligning it with the cartridge stem and pushing it down until it fits snugly. Secure the handle with the screw.8. Apply Plumber's Putty
Apply a thin bead of plumber's putty around the base of the faucet spout where it meets the sink. This will create a watertight seal.9. Turn On the Water Supply
Open the shut-off valves to turn the water supply back on. Check for any leaks around the base of the faucet or the handle. If you notice any leaks, tighten the appropriate connections further.Conclusion
Fixing a dripping Delta bathroom sink faucet is a straightforward process that can be completed in a matter of minutes. By following these instructions, you can restore your faucet to proper working condition and prevent further water damage. If you encounter any difficulties or if the faucet continues to leak after following these steps, it's best to contact a qualified plumber for assistance.
Simple Ways To Fix A Leaky Delta Bathroom Sink Faucet

Simple Ways To Fix A Leaky Delta Bathroom Sink Faucet

How To Fix A Leaky Delta Style Bathroom Faucet

Sink Faucet Repair Delta Bathroom Drips

How To Repair Leaking Dripping Delta Faucet Diyplumbing Serviceplumbing Tappplumbing

Simple Ways To Fix A Leaky Delta Bathroom Sink Faucet

How To Fix A Leaky Faucet Delta Blog

Delta Foundations 4 In Centerset Single Handle Bathroom Faucet Brushed Nickel B510lf Ssppu Eco The Home Depot

How To Replace A Two Handle Faucet Delta Blog

How To Fix A Leaky Faucet Kitchen Repair Moen Bathroom Faucets
Related Posts