Essential Aspects of How To Fix A Loose Bathroom Tap Handle
Maintaining the functionality of your bathroom fixtures is essential for a comfortable and efficient space. A loose bathroom tap handle can be a common issue that can be easily resolved by addressing its essential aspects. This article will delve into the key factors to consider when fixing a loose tap handle, providing a step-by-step guide to restore its proper operation.
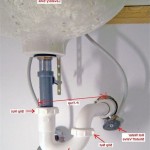
To begin, it is crucial to understand the components of a tap handle. A bathroom tap handle typically consists of a handle, a handle stem, a packing nut, and a washer. The handle stem connects the handle to the water supply, while the packing nut and washer provide a seal to prevent water leakage. When the tap handle becomes loose, it may indicate that one or more of these components require adjustment or replacement.
The first step in fixing a loose tap handle is to determine the cause of the issue. Check if the handle stem is loose by gently wiggling it. If it moves, you may need to tighten the packing nut. The packing nut is located at the base of the handle, where it connects to the water supply. Use a wrench or pliers to carefully tighten the packing nut, taking care not to overtighten it.
If tightening the packing nut does not resolve the issue, you may need to replace the washer. The washer is a small, rubber or plastic disc that sits between the packing nut and the handle stem, creating a seal against water leakage. To replace the washer, first turn off the water supply to the tap and remove the handle. Use a wrench or pliers to loosen the packing nut and remove the old washer. Place a new washer on the handle stem and tighten the packing nut.
In some cases, the handle stem itself may be damaged or worn, requiring replacement. This is usually indicated by significant movement or play in the handle. To replace the handle stem, you will need to remove the handle and unscrew the handle stem using a wrench or pliers. Apply some plumber's grease to the new handle stem and screw it into place. Tighten the packing nut and reattach the handle.
Once you have addressed the loose tap handle, it is important to test it for proper operation. Turn on the water supply and check for any leaks or dripping. If there are still issues, you may need to repeat the steps above or consult a professional plumber for further assistance.
By considering the essential aspects of fixing a loose bathroom tap handle, you can restore the functionality of your fixture and maintain a comfortable and efficient bathroom space.

How To Tighten Faucet Handle Homeserve Usa

Tighten A Loose Lever On Moen Brantford Faucet

How To Tighten A Bathroom Faucet Handle

How To Fix Loose Sink Faucet

Bathroom Faucet Handles Loose Wobbly Diy Fix

Sbw 8 A Loose Bathroom Faucet Handle

How To Tighten Loose Faucet Handle A Step By Guide

How To Fix A Bathroom Faucet 14 Steps

How To Fix A Loose Bath Tub Faucet Handle Ifixit Repair Guide

How To Fix A Faucet Tighten Kitchen Sink Handle
Related Posts