How to Fix a Two-Handle Delta Bathroom Faucet
Two-handle Delta bathroom faucets are a popular choice for their classic design and reliable performance. However, even the best faucets can develop problems over time. If your Delta faucet is leaking, dripping, or not working properly, don't despair. With a few simple tools and a little bit of know-how, you can easily fix most common faucet problems yourself.
In this article, we will provide a step-by-step guide on how to fix a two-handle Delta bathroom faucet. We will cover the most common problems, including:
- Leaking from the handle
- Faucet dripping
- No hot or cold water
- Handle is loose
Tools and Materials You'll Need
Before you begin, gather the following tools and materials:- Adjustable wrench
- Phillips head screwdriver
- Allen wrench (if applicable)
- Replacement faucet parts (if needed)
- Plumber's tape
Step-by-Step Guide to Fixing a Two-Handle Delta Bathroom Faucet
1. Shut Off the Water Supply
Before you begin working on the faucet, shut off the water supply to the bathroom. There are usually two shut-off valves under the sink, one for hot water and one for cold water. Turn the valves clockwise to turn off the water.2. Remove the Handle
Once the water is shut off, remove the handle. On Delta faucets, the handle is usually held in place by a screw or an Allen screw. Use the appropriate tool to remove the screw and lift the handle off the faucet.3. Inspect the Cartridge
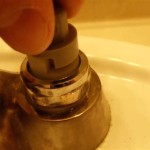
Once the handle is removed, you will see the cartridge. The cartridge is the part of the faucet that controls the flow of water. Inspect the cartridge for any signs of damage or wear. If the cartridge is damaged, it will need to be replaced.4. Replace the Cartridge (if necessary)
If the cartridge is damaged, it will need to be replaced. To do this, use an adjustable wrench to loosen the packing nut that holds the cartridge in place. Once the packing nut is loose, you can pull the cartridge out of the faucet. Replace the old cartridge with a new one and tighten the packing nut.5. Reattach the Handle
Once the cartridge is replaced, reattach the handle. Insert the handle onto the faucet and tighten the screw or Allen screw to secure it.6. Turn on the Water Supply
Once the handle is reattached, turn on the water supply and check for leaks. If there are any leaks, tighten the packing nut or replace the O-rings.Additional Tips
- If your faucet is leaking from the base, it is likely that the O-rings need to be replaced.
- If your faucet is dripping, it is likely that the washer needs to be replaced.
- If you are having trouble removing the handle, try using a penetrating oil to loosen the screw.
- If you are not comfortable working on your faucet yourself, call a licensed plumber for assistance.

How To Fix Leaky Bathroom Handle Delta Faucet Model 4530 Series Hard Water

How To Replace A Two Handle Faucet Delta Blog

How To Fix A Leaky Delta Two Handle Faucet

How To Repair A Leaking Delta Two Handle Ceramic Lavatory Faucet Valve

Repair Parts For One And Two Handle Delta Bathroom Faucets

How To Fix A Double Handle Delta Kitchen Sink Faucet Leak

Tips Tricks Remove Delta 2 Handle 4 In Bathroom Sink Faucet With Bar 5 21 18

Delta Two Handle Widespread Bathroom Faucets User Manual

Repair Parts For One And Two Handle Delta Bathroom Faucets

Simple Ways To Fix A Leaky Delta Bathroom Sink Faucet
Related Posts


