How to Fix a Grohe Bathroom Faucet
Grohe bathroom faucets are known for their quality and durability, but even the best faucets can develop problems over time. If your Grohe faucet is leaking, dripping, or not working properly, there are a few things you can do to try to fix it yourself. In this article, we will provide you with step-by-step instructions on how to fix the most common Grohe bathroom faucet problems.
Tools You Will Need
- Adjustable wrench
- Phillips screwdriver
- Flathead screwdriver
- Allen wrench
- Replacement parts (if necessary)
Troubleshooting and Fixing Common Problems
1. Leaking FaucetA leaking faucet is one of the most common problems that you may encounter with your Grohe bathroom faucet. There are a few different things that can cause a faucet to leak, including:
- Worn or damaged O-rings
- Loose or damaged valve seat
- Cracked or damaged faucet body
To fix a leaking faucet, you will need to identify the source of the leak and replace the damaged parts. Here are the steps on how to do it:
- Turn off the water supply to the faucet.
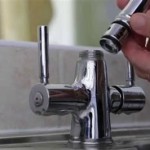
- Remove the aerator by unscrewing it counterclockwise.
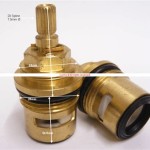
- Using a wrench, loosen the packing nut. Remove the handle and stem assembly.
- Inspect the O-rings and valve seat for any damage or wear. Replace them if necessary.
- Reassemble the faucet by following the steps in reverse order.
A dripping faucet is another common problem that you may encounter with your Grohe bathroom faucet. A dripping faucet can be caused by a number of things, including:
- Worn or damaged washer
- Loose or damaged valve seat
- Dirt or debris in the faucet
To fix a dripping faucet, you will need to identify the source of the leak and replace or repair the damaged parts. Here are the steps on how to do it:
- Turn off the water supply to the faucet.
- Remove the aerator by unscrewing it counterclockwise.
- Using a wrench, loosen the packing nut. Remove the handle and stem assembly.
- Inspect the washer and valve seat for any damage or wear. Replace them if necessary.
- Clean the faucet body and stem assembly to remove any dirt or debris.
- Reassemble the faucet by following the steps in reverse order.
If your Grohe bathroom faucet is not working properly, it could be due to a number of reasons, including:
- Clogged aerator
- Loose or damaged handle
- Faulty cartridge
To fix a faucet that is not working properly, you will need to identify the source of the problem and replace or repair the damaged parts. Here are the steps on how to do it:
- Turn off the water supply to the faucet.
- Remove the aerator by unscrewing it counterclockwise.
- Using a wrench, loosen the packing nut. Remove the handle and stem assembly.
- Inspect the aerator, handle, and cartridge for any damage or wear. Replace them if necessary.
- Reassemble the faucet by following the steps in reverse order.
Conclusion
Fixing a Grohe bathroom faucet is not a difficult task, but it does require some basic plumbing knowledge and skills. If you are not comfortable working on your own plumbing, it is best to call a professional plumber to help you. By following the instructions in this article, you can fix most common Grohe bathroom faucet problems yourself and save money on costly repairs.

Parts For Grohe Talia Series Bathroom Fixtures

Parts For Grohe Seabury Series Vintage Designer Bath Fixtures

Parts For Grohe Somerset Series Fixtures

Parts For Grohe Geneva Series Old Fashioned Bath Roducts

Grohe Bau Cosmopolitan Battery Powered Single Hole Touchless Bathroom Faucet With Temperature Control Lever Starlight Chrome 36466000 The Home Depot

Grohe Faucet Handle Keeps Moving The Wrong Way

Grohe Ve 4 In Centerset Single Handle Bathroom Faucet Starlight Chrome 23837000 The Home Depot

Parts For Grohe Talia Series Bathroom Fixtures

32642003 By Grohe Eurosmart Single Hole Handle S Size Bathroom Faucet 1 2 Gpm Studio41

Grohe 326423 Eurosmart 6 5 8 Single Handle Bathroom Faucet With Drain Kit
Related Posts


