How to Fix a Leaking Bathroom Tub Faucet
A leaking bathroom tub faucet is a common household issue that can waste water and increase your utility bills. While it may seem like a complex problem, fixing a leaking faucet is often a simple task that can be completed in a matter of minutes with the right tools and materials. In this article, we will provide a step-by-step guide on how to fix a leaking bathroom tub faucet, covering the most common causes and solutions.
Identifying the Source of the Leak
Before you can fix a leak, it is important to identify where the water is coming from. Check for leaks around the base of the faucet, the handle, and the spout. If you see any water dripping from these areas, you have identified the source of the leak.
Tools and Materials You'll Need
To fix a leaking bathroom tub faucet, you will need the following tools and materials:
- Adjustable wrench
- Phillips head screwdriver
- Replacement faucet washer (if needed)
- Plumber's tape
- Cloth or rag
Step-by-Step Instructions
Once you have gathered the necessary tools and materials, follow these steps to fix the leaking faucet:
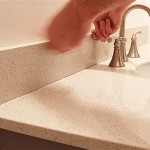
1. Turn Off the Water Supply
Before starting any work, turn off the water supply to the faucet. This is typically done by turning the valve located under the sink or behind the toilet. If you are unable to locate the water supply valve, contact a plumber for assistance.
2. Remove the Faucet Handle
Using a screwdriver, remove the screw that holds the faucet handle in place. If the screw is corroded or difficult to remove, use penetrating oil to loosen it. Once the screw is removed, pull the handle straight up to detach it from the faucet body.
3. Replace the Faucet Washer
If the leak is coming from the handle, you will need to replace the faucet washer. The faucet washer is a small rubber or plastic washer that creates a watertight seal between the handle and the faucet body. To replace the faucet washer, use an adjustable wrench to remove the packing nut located behind the handle. Once the packing nut is removed, you can remove the old washer and replace it with a new one.
4. Wrap the Faucet Threads with Plumber's Tape
If the leak is coming from the base of the faucet, you may need to wrap the faucet threads with plumber's tape. Plumber's tape is a thin, white tape that helps to create a watertight seal. Wrap the tape clockwise around the threads of the faucet, starting from the bottom. Make sure that the tape is wrapped tightly, but do not overtighten it.
5. Reassemble the Faucet
Once you have replaced the faucet washer or wrapped the faucet threads with plumber's tape, reassemble the faucet. Insert the packing nut back into the faucet body and tighten it using an adjustable wrench. Replace the handle and screw it in place. Turn the water supply back on and check for leaks.
Additional Tips
If the leak persists after following the steps above, you may need to replace the faucet cartridge. The faucet cartridge is a cylindrical component that controls the flow of water. To replace the faucet cartridge, you will need to remove the handle and packing nut as described in steps 2 and 3 above. Once the packing nut is removed, you can pull out the old cartridge and insert a new one. Make sure that the new cartridge is compatible with your faucet model.
If you are not comfortable fixing the faucet yourself, or if the leak is severe, it is best to contact a qualified plumber for assistance.

How To Fix A Leaking Bathtub Faucet Diy Family Handyman

How To Replace A Leaky Bathtub Faucet Prevent Water Stains

How To Fix A Leaky Bathtub Faucet 6 Ways Stop Drips

How To Fix A Leaky Bathtub Faucet Removing The Spout From

How To Fix A Leaky Tub Shower Faucet

How To Fix A Bathtub Faucet From Leaking Dripping 3 Steps

How To Fix A Leaking Bathtub Faucet Repair Replace

11 Easy Steps To Fix A Leaking Bathtub Faucet In 2024 Spout

How To Fix A Leaky Bathtub Faucet Delta Shower Cartridge L Replace

How To Stop A Dripping Bathtub Faucet Nj Plumbing Repair Replacement And Maintenance