How to Effectively Fix Water Leaks in Bathroom Sinks
A leaky bathroom sink can be a frustrating and costly problem. Not only does it waste water, but it can also damage your sink, countertop, and floor. Fortunately, most bathroom sink leaks are relatively easy to fix with a few basic tools and materials. Here's a step-by-step guide to help you diagnose and fix a leaking bathroom sink:
Step 1: Identify the Source of the Leak
The first step is to determine where the water is leaking from. Check the base of the faucet, the drain, and the supply lines for any signs of water damage or dripping. Once you've found the source of the leak, you can proceed with the appropriate repair.
Step 2: Gather the Necessary Tools and Materials
Depending on the source of the leak, you may need the following tools and materials:
- Adjustable wrench
- Pliers
- Screwdriver
- Replacement washer or O-ring
- Teflon tape
- Plumber's putty
- Bucket or bowl
Step 3: Turn Off the Water Supply
Before you begin any repairs, it's important to turn off the water supply to the sink. Locate the shut-off valves under the sink or behind the access panel and turn them clockwise to close them.
Step 4: Replace a Leaking Washer
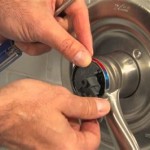
If the leak is coming from the base of the faucet, it's likely caused by a worn-out washer. Replace the washer by unscrewing the nut that holds the handle in place and removing the old washer. Apply a thin layer of plumber's putty to the new washer and insert it into place. Retighten the nut and turn on the water to check for leaks.
Step 5: Tighten Loose Supply Lines
If the leak is coming from the supply lines, use an adjustable wrench to tighten the nuts that connect the lines to the faucet. Be careful not to overtighten the nuts, as this could damage the lines.
Step 6: Replace a Leaking Drain
If the leak is coming from the drain, you may need to replace the drain assembly. Start by removing the pop-up stopper and unscrewing the drain nut. Pull out the old drain assembly and insert the new one. Apply a bead of plumber's putty around the base of the drain and tighten the drain nut. Reinstall the pop-up stopper and turn on the water to check for leaks.
Step 7: Check for Cracks or Damage
If the leak is coming from the sink itself, you may need to replace the sink. Inspect the sink for any cracks or damage that could be causing the leak. If you find any cracks, you can try to repair them with epoxy or silicone sealant. However, it's important to note that repairs to cracks may not always be permanent and may require replacement of the sink.
By following these steps, you can effectively fix most bathroom sink leaks. If you're not comfortable making repairs yourself, it's always best to call a qualified plumber for assistance.

How To Fix A Leaking Bathroom Sink Paschal Air Plumbing Electric

Common Sink Leaks You Could Probably Fix Yourself

Bathroom Sink Drain Leaking Around Threads Premier Plumbing Inc

How To Fix A Leaking Bathroom Sink Paschal Air Plumbing Electric

How To Fix Pipework A Tap Faucet Leaking Under The Sink

Bathroom Sink Drain Leaking Around Threads Premier Plumbing Inc

Best Ways To Clean Your Bathroom Sink Drain Yourself

5 Reasons Your Faucet Is Dripping Water How To Fix It

5 Reasons Your Faucet Is Dripping Water How To Fix It

Bathroom Leak Top 5 Causes Waterleak Co
Related Posts


