How to Install a Bathroom Basin
Installing a bathroom basin is a relatively simple plumbing project that can be completed in a few hours. By following these step-by-step instructions, you can save yourself the cost of hiring a plumber and enjoy the satisfaction of completing the project yourself.
Tools and Materials You'll Need:
- New bathroom basin
- Basin wrench
- Adjustable wrench
- Plumber's putty or silicone sealant
- Tape measure
- Level
- Faucet
- Pop-up drain
- Teflon tape
Step 1: Prepare the Bathroom
Before beginning the installation, turn off the water supply to the bathroom and open the faucets to release any remaining water.
Step 2: Remove the Old Basin
If there is an existing basin, use a basin wrench to loosen the nuts holding it in place. Carefully lift the basin off the countertop and remove the old faucet and pop-up drain.
Step 3: Install the Faucet
Apply Teflon tape to the threads of the faucet's water supply lines. Insert the faucet into the holes in the countertop and tighten the mounting nuts from below. Connect the water supply lines to the shut-off valves.
Step 4: Install the Drain
Apply plumber's putty or silicone sealant to the underside of the pop-up drain flange. Insert the drain into the drain hole and tighten the mounting nut from below.
Step 5: Place the Basin
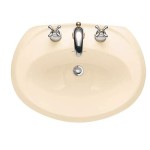
Apply a bead of plumber's putty or silicone sealant around the rim of the basin where it will contact the countertop. Carefully place the basin onto the countertop and align it with the faucet and drain.
Step 6: Level the Basin
Use a level to check that the basin is level both front-to-back and side-to-side. Adjust the basin as needed by adding or removing plumber's putty or silicone sealant.
Step 7: Tighten the Basin
Use a basin wrench to tighten the nuts holding the basin in place from below. Do not overtighten the nuts, as you could crack the basin.
Step 8: Connect the Drain and Water Supply
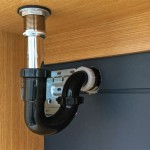
Connect the drain pipe to the pop-up drain and tighten the connection. Turn on the water supply and check for leaks. Tighten any loose connections as needed.
Step 9: Finish the Installation
Install the overflow cover and any other decorative trim. Wipe down the basin and countertop to remove any excess sealant or putty.
Tips:
- Use a generous amount of plumber's putty or silicone sealant to ensure a watertight seal.
- Do not overtighten the nuts when tightening the basin, as this could crack the basin.
- If you are installing a vessel sink, additional support may be required underneath the sink to prevent it from sagging.
- If you are not comfortable working with plumbing, it is best to hire a professional plumber to install the basin for you.

How To Fit A Bathroom Sink Diy Guides Victorian Plumbing

How To Install A Bathroom Vanity

Here S How Install A Bathroom Pedestal Sink

How To Install A Bathroom Sink Step By Guide

How To Remove Bathroom Basin Install New Sink Vanity Unit Step By Diy Guide

How To Install A Bathroom Vanity And Sink

Bathroom Sink Plumbing Installation

How To Install A Bathroom Sink Or Basin Victoriaplum Com

Wash Basin Install Taps Plug And Waste Pipe

12 Easy Steps To Install Bathroom Vanity And Sink
Related Posts


