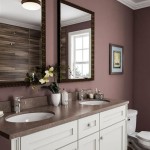
How to Install a Bathroom Mixer Tap
Upgrading your bathroom mixer tap can refresh the entire look of your bathroom. It's a relatively simple project that can be completed in a few hours, making it a perfect DIY weekend task. Here's a comprehensive guide to help you install a bathroom mixer tap with ease:
Tools and Materials:
- New bathroom mixer tap
- Adjustable wrench
- Basin wrench
- Teflon tape
- Plumber's putty
- Screwdriver
Step 1: Remove the Old Tap
Turn off the water supply valves beneath the basin. Use an adjustable wrench to loosen the mounting nuts that connect the tap to the basin and remove the old tap.
Step 2: Clean the Base
Thoroughly clean the surface where the new tap will be installed. Use a damp cloth to remove any old sealant or debris.
Step 3: Apply Plumber's Putty
Roll out a small piece of plumber's putty and form it into a rope. Place the putty around the base of the tap's body, ensuring an even distribution.
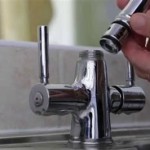
Step 4: Install the New Tap
Position the new tap over the putty and gently press down to ensure a secure seal. Use the mounting nuts to tighten the tap to the basin by hand.
Step 5: Install the Water Supply Lines
Connect the braided water supply lines to the hot and cold water supply valves. Use a basin wrench to tighten the connections firmly but gently.
Step 6: Seal the Connections
Apply Teflon tape to the threads of the water supply lines and screw them into the tap's inlet connections. Tighten the connections using a wrench.
Step 7: Install the Handle
Insert the handle onto the tap's stem and secure it with the included screws. Ensure the handle operates smoothly without any stiffness.
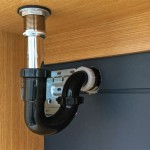
Step 8: Connect the Drain Assembly (Optional)
If the tap includes a drain assembly, connect it by inserting the rubber washer into the drain hole and screwing on the drain assembly.
Step 9: Turn on the Water Supply
Slowly turn on the water supply valves and check for any leaks. If you notice any leaks, tighten the connections accordingly.
Tips:
- Use a flat-head screwdriver to prevent scratching the tap's surface when tightening the screws.
- Apply a small amount of silicone sealant around the base of the tap for added waterproofing.
- If the tap doesn't fit perfectly, you may need to adjust the mounting nuts slightly.
- If you have any doubts or encounter any difficulties, don't hesitate to seek professional assistance.
Congratulations! You have successfully installed your new bathroom mixer tap. Enjoy the fresh look and improved functionality of your upgraded bathroom.

How To Install A Bath Shower Mixer Tap Cartridge User Guide

How To Install A Bath Shower Mixer Tap User Guide

Step By Guide Installing A Basin Mixer For Modern And Functional Bathroom Upgrade

Bath Shower Mixer Diverter Maintenance And Replacement

Steps For How To Change A Mixer Tap Bathware Direct

How To Install A Mixer Tap In 15 Minutes The Easy Way

How To Easily Replace Basin Taps Step By

Installation Guide Install A Single Lever Bath Shower Mixer Grohe

How To Install Mondella Shower Mixer Tap Bunnings Work Community

Installing A Free Standing Bath Mixer Spout In The Bathroom
Related Posts