How To Install Bathroom Vent Thru Roof
To ensure proper ventilation in your bathroom and prevent moisture buildup, installing a bathroom vent through the roof is an effective solution. Whether you're a DIY enthusiast or seeking a professional's help, following these steps will guide you through the process.
Step 1: Assess Your Roof and Attic Space
Before commencing the installation, conduct a thorough inspection of your roof and attic. Ensure there are no issues like leaks, damaged shingles, or inadequate insulation. If necessary, address these concerns before proceeding.
Step 2: Choose the Right Vent
Selecting the appropriate vent for your bathroom is crucial. Consider factors like the size of the bathroom, CFM (cubic feet per minute) rating, and the type of vent (e.g., powered or non-powered). Consult with a professional if you're uncertain about the best choice.
Step 3: Determine the Vent Placement
Choose an appropriate location for installing the vent. It should be as close as possible to the shower or bathtub, while maintaining a distance of at least 3 feet from any windows or doors. Mark the selected spot on the roof with chalk or a marker.
Step 4: Cut the Roof Opening
Using a reciprocating saw or a roofing saw, carefully cut a hole in the marked area on the roof. The size of the opening should match the dimensions of the vent you've chosen.
Step 5: Install the Vent Cap
Position the vent cap over the roof opening and secure it tightly using the provided screws or nails. Ensure a snug fit to prevent leaks.
Step 6: Connect the Vent Duct
Run a vent duct from the bathroom to the roof vent. Utilize rigid or flexible ducting, depending on the layout of your attic. Connect the duct to the vent cap using a connector or adapter.
Step 7: Seal the Roof Opening
Apply a generous amount of roofing sealant around the perimeter of the vent cap to prevent water leakage. Additionally, seal any gaps between the duct and the roof.
Step 8: Connect to Power (if Applicable)
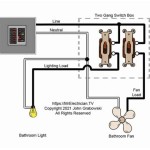
For powered vents, connect the electrical wiring from the vent motor to a dedicated circuit breaker. Ensure proper wiring to maintain safety standards.
Step 9: Test the Ventilation System
Finally, turn on the ventilation system and check for proper operation. Confirm that the fan is functioning correctly and there are no unusual noises or vibrations.
Step 10: Maintain the Ventilation System
To ensure the longevity and efficiency of your bathroom vent, maintain regular maintenance. Clean the vent cover and duct periodically to prevent dust and debris buildup. Additionally, have the system inspected by a professional every few years.
Conclusion
By following these steps, you can effectively install a bathroom vent through the roof. This will aid in eliminating excess moisture, preventing mold and mildew growth, and improving overall ventilation in your bathroom. Always prioritize safety and adhere to local building codes when undertaking such projects.

Installing A Bathroom Fan Fine Homebuilding

How To Replace And Install A Bathroom Exhaust Fan From Start Finish For Beginners Easy Diy

Blog

Venting A Bath Fan In Cold Climate Fine Homebuilding

Venting A Bathroom Through Sips Fine Homebuilding

Bathroom Exhaust Fans Building America Solution Center

How To Install A Bathroom Exhaust Fan Lowe S

Venting A Bathroom Through Sips Fine Homebuilding

Bathroom Vent Piping To Near Exterior Inspecting Hvac Systems Internachi Forum

Roof Flashing For Bathroom Fans
Related Posts


