How to Install a Moen Single-Handle Bathroom Faucet
Installing a new bathroom faucet can be a quick and easy project, even for beginners. If you're looking to update the look of your bathroom or replace a leaky faucet, a Moen single-handle faucet is a great option. Here's a step-by-step guide on how to install a Moen single-handle bathroom faucet:
Step 1: Gather Your Tools and Materials
Before you start, gather the following tools and materials:
- Moen single-handle bathroom faucet
- Adjustable wrench
- Pliers
- Screwdriver
- Measuring tape
- Level
- Plumber's putty
- Thread sealant
- Teflon tape
Step 2: Prepare the Sink
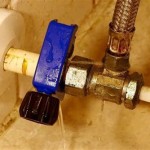
Turn off the water supply to the sink and disconnect the old faucet. Clean the sink surface where the new faucet will be installed.
Step 3: Assemble the Faucet
Take the Moen single-handle faucet out of the box and assemble it according to the manufacturer's instructions. This typically involves inserting the cartridge into the faucet body, attaching the handle, and securing the aerator.
Step 4: Apply Plumber's Putty
Roll out a rope of plumber's putty and apply it to the underside of the faucet base. This will help create a watertight seal between the faucet and the sink.
Step 5: Position the Faucet
Place the faucet assembly on the sink and center it. Use the level to ensure that the faucet is level both front to back and side to side.
Step 6: Install the Mounting Hardware
Attach the mounting hardware according to the manufacturer's instructions. This typically involves tightening the nuts or bolts that secure the faucet to the sink.
Step 7: Connect the Water Supply Lines
Wrap Teflon tape around the threads of the water supply lines. Connect the water supply lines to the faucet body, making sure that the hot and cold water lines are connected to the correct valves.
Step 8: Turn On the Water Supply
Turn on the water supply and check for leaks. If there are any leaks, tighten the connections or apply more plumber's putty.
Step 9: Test the Faucet
Turn on the faucet and check that the water flows smoothly and that the handle operates properly.
Step 10: Finish Up
Wipe down the faucet and sink to remove any excess water or debris. Enjoy your new Moen single-handle bathroom faucet!

How To Install A Moen Centerset Faucet

How To Replace Repair A Leaky Moen Cartridge In Bathroom Set Of Faucets Single Lever Tips

Installing A One Handle Posi Temp Shower Valve Pex To

Single Handle Bathroom Faucet And Drain Replacement Easy Step By Tips For Beginners

Diy How To Install The Moen Boardwalk Faucet Redhead Mom

How To Install Moen 3 Pc Lav Faucet

How To Install Moen Widespread Bathroom Faucets

Single Handle Bathroom Faucet Installation Like A Pro Delta And Moen

Bathroom Faucet Cartridge Replacement

How Do I Replace My Moen Bathroom Faucet Cartridge Faucets Kitchen With Sprayer
Related Posts