Laying Ceramic Tile Floors in Your Bathroom: Essential Aspects
Creating a beautiful and functional bathroom requires careful consideration of various elements, including the choice of flooring. Ceramic tile is a popular choice due to its durability, water resistance, and aesthetic appeal. However, laying ceramic tile can be a complex process, and understanding the essential aspects is crucial for a successful installation.
The following article explores the most important aspects to consider when laying ceramic tile floors in your bathroom. By following these guidelines, you can ensure a professional-looking finish and enjoy the benefits of your new floor for years to come.
1. Preparation
Proper preparation is essential to ensure a strong and durable installation. Begin by thoroughly cleaning the subfloor to remove any dirt, debris, or grease. Any uneven surfaces or cracks should be repaired using leveling compound or concrete mix.
Once the subfloor is clean and level, apply a thin layer of thin-set mortar using a notched trowel. This adhesive will create a strong bond between the tile and the subfloor.
2. Layout and Spacing
Before applying the tile, determine the layout and spacing. Use spacers to maintain consistent gaps between the tiles, ensuring even grout lines. Plan the layout to avoid cutting small pieces around the edges of the room.
For a more visually appealing result, consider using different tile sizes or colors to create patterns or accents. However, ensure that the spacing and layout complement the bathroom's overall design.
3. Setting the Tile
Begin setting the tile by placing it on the thin-set mortar. Use a level to ensure each tile is level and flush with the adjacent tiles. Press down firmly to create a strong bond.
Continue setting the tiles row by row, carefully aligning them and maintaining consistent spacing. Use a tapping block and rubber mallet to adjust the tiles as needed.
4. Grouting
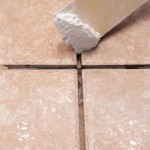
After the tile is set, allow it to dry for at least 24 hours. Then, apply grout to fill the gaps between the tiles. Use a grout float to spread and press the grout into the joints.
Once the grout is applied, remove any excess using a damp sponge. Allow the grout to set for several hours, then use a clean, dry cloth to remove any remaining haze or residue.
5. Sealing
To protect the tile and grout from moisture and stains, apply a sealer. Use a high-quality sealer specifically designed for ceramic tile and grout.
Apply the sealer according to the manufacturer's instructions, ensuring that all tiles and grout are thoroughly coated. Allow the sealer to dry for the specified time before walking or cleaning the floor.
Conclusion
Laying ceramic tile floors in your bathroom requires careful attention to these essential aspects. By following these guidelines, you can create a beautiful, durable, and waterproof floor that will enhance the look and functionality of your bathroom for years to come.
Remember to consult professional installers if you are uncertain about any part of the process or encounter unexpected challenges during installation.

How To Lay Bathroom Tile 5 Easy Steps Rubi Blog Usa

How To Lay A Tile Floor

How To Lay A Tile Floor

Complete Guide On How To Install Ceramic Floor Tiles Rubi Blog Usa

Materials Needed To Lay Tile Floor The Best Tools Rubi Blog Usa

Laying Floor Tiles In A Small Bathroom Houseful Of Handmade

Subfloor For Tile Installation Everything You Need To Know

Complete Guide On How To Install Ceramic Floor Tiles Rubi Blog Usa

Bathroom Floor Tile Layout In 5 Easy Steps Diytileguy

Installing Tile Floor For The First Time How To Lay Crafted Work
Related Posts