Crafting Your Own Bathroom Vanity Top: A Do-it-Yourself Guide to Personalizing Your Bathroom
A bathroom vanity top is the centerpiece of your bathroom, setting the tone for the entire space. Whether you're renovating an existing bathroom or designing a new one, creating your own vanity top is an opportunity to express your creativity and add a touch of uniqueness to your home.
While it may seem like a daunting task, building your own bathroom vanity top is more manageable than you might think. With the right materials, tools, and a little patience, you can create a custom vanity top that perfectly complements your bathroom and your personal style.
Essential Materials:
- Vanity Top Material: Choose a durable and water-resistant material such as natural stone (granite, marble, or quartz), engineered stone (quartzite, porcelain), or solid surface material (acrylic or composite).
- Vanity Cabinet: The vanity cabinet will support your vanity top. Select a cabinet that is the correct size and height for your space.
- Undermount Sink: An undermount sink will create a seamless look and provide more countertop space.
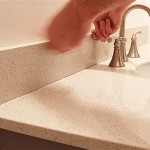
- Faucet: Choose a faucet that complements the style of your vanity top and bathroom.
- Adhesive: Use a construction adhesive specifically designed for bonding vanity tops to cabinets.
- Sealant: A silicone sealant will prevent water from seeping into the seams and joints.
Step-by-Step Instructions:
1. Prepare the Vanity Cabinet:Clean the surface of the vanity cabinet where the vanity top will be attached. Make sure the surface is level and free of any debris.
2. Apply Adhesive:Apply a generous amount of construction adhesive to the top surface of the vanity cabinet. Follow the manufacturer's instructions for the specific adhesive you are using.
3. Place the Vanity Top:Carefully lift the vanity top and place it onto the cabinet. Align the edges of the vanity top with the edges of the cabinet.
4. Secure the Vanity Top:Tighten the screws or bolts that secure the vanity top to the cabinet. Use shims or spacers as needed to ensure the vanity top is level.
5. Install the Sink:Fit the undermount sink into the cutout on the vanity top. Apply a bead of silicone sealant around the edge of the sink where it meets the vanity top.
6. Install the Faucet:Drill the holes for the faucet and install the faucet according to the manufacturer's instructions.
7. Seal the Joints:Apply a bead of silicone sealant around the edges of the vanity top where it meets the cabinet and around the sink. Smooth the sealant with a damp finger or a sealant tool.
8. Allow Time to Cure:Allow the adhesive and sealant to cure according to the manufacturer's instructions. This may take several hours or even overnight.
Tips for Success:
- Measure carefully before you cut any materials.
- Use a level to ensure the vanity top is installed correctly.
- Apply adhesive liberally to ensure a strong bond.
- Seal all joints and seams thoroughly to prevent water damage.
- Follow the manufacturer's instructions for all materials and products.

Build A Diy Bathroom Vanity Part 6 Adding Granite Top

Custom Vanity Top Natural Live Edge Wood Countertop

How To Build A Laminate Vanity Top

Introducing Custom Vanity Top Designer Solidsurface Com Blog
:max_bytes(150000):strip_icc()/build-something-diy-vanity-594402125f9b58d58ae21158.jpg?strip=all "16 Diy Bathroom Vanity Plans You Can Build Today")
16 Diy Bathroom Vanity Plans You Can Build Today

Diy Wood Vanity In The Master Bathroom Space Between

A Natural Treat Live Edge Vanity Top Redefines Modern Bathrooms Decoist

How To Build Your Own Bathroom Vanity Fine Homebuilding

Diy Bathroom Countertop Made From Cedar Fence Boards Addicted 2 Decorating
:strip_icc()/102130266-3174ac7d31314c7abfc80a1b65a11dd6.jpg?strip=all "18 Luxurious Bathroom Countertop Ideas For All Budgets")
18 Luxurious Bathroom Countertop Ideas For All Budgets
Related Posts