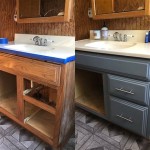
How to Revive an Old Bathroom Cabinet
Are you tired of your outdated bathroom cabinet? Does it clash with your modern bathroom décor? Don't despair; you can give it a fresh new look without spending a fortune. Painting an old bathroom cabinet is a cost-effective way to update your bathroom and match your existing color scheme.
Painting a bathroom cabinet may seem daunting, but it's a manageable task with the right tools and materials. Here's a step-by-step guide to help you through the process:
1. Preparation
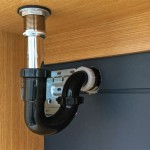
Start by emptying the cabinet and removing the doors and drawers. Clean the cabinet thoroughly with a degreaser to remove any dirt or grease. Sand the surface lightly to ensure the paint adheres properly. Remove any hardware and fill any holes or dents with wood filler. Let the wood filler dry completely before sanding it smooth.
2. Priming
To ensure a smooth, durable finish, apply a coat of primer to the cabinet. Primer helps the paint adhere better and prevents the wood grain from showing through. Choose a primer specifically designed for kitchen and bathroom cabinets for optimal adhesion and moisture resistance.
3. Painting
Now for the fun part! Select a paint specifically formulated for bathroom use. These paints are designed to withstand humidity and moisture. Use a high-quality brush or roller for a smooth, even finish. Apply two thin coats of paint, allowing each coat to dry completely before applying the next.
4. Distressing (Optional)
If you prefer a distressed or vintage look, you can distress the painted cabinet. Use sandpaper to gently sand the edges and corners of the cabinet to create a worn-out effect. You can also use a damp cloth to wipe away some of the paint, exposing the underlying primer or wood.
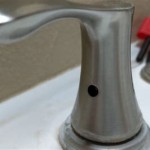
5. Hardware
Once the paint is completely dry, reattach the hardware. You can reuse the old hardware or upgrade to new ones that match your updated style. Make sure the hardware is securely tightened.
6. Sealing
To protect the painted finish and make it more durable, apply a clear sealer. Choose a sealer specifically designed for bathroom surfaces for maximum protection against moisture and stains. Allow the sealer to dry according to the manufacturer's instructions.
7. Curing
Allow the cabinet to cure for at least 24 hours before using it. This will ensure that the paint and sealer have fully hardened and are ready to withstand everyday use.
Tips for Success
- Use a well-ventilated area when painting and sealing.
- Allow ample drying time between each step.
- Use high-quality materials for a long-lasting finish.
- Don't be afraid to experiment with different colors or finishes to find the perfect look for your bathroom.
- If you're not confident in your painting skills, consider hiring a professional to ensure a flawless finish.
With a little effort and attention to detail, you can transform your old bathroom cabinet into a stylish and functional piece that complements your bathroom décor. So grab your tools, choose your favorite color, and let your creativity shine!
.jpg?strip=all "Painting A Bathroom Vanity Again Dream Green Diy")
Painting A Bathroom Vanity Again Dream Green Diy

Bathroom Vanity Makeover With Chalk Paint Decor Adventures

Paint Bathroom Vanity Countertop Sink So Easy A Piece Of Rainbow

21 Beautiful Painted Bathroom Cabinet Ideas

How To Paint Laminate Cabinets Love Renovations

How To Paint Bathroom Cabinets Without Sanding 8 Vital Steps Grace In My Space

How To Paint A Bathroom Vanity Ace Hardware

Chalk Paint Cabinets Bathroom Renovation

Updating A Bathroom Vanity

How To Paint Bathroom Cabinets Without Sanding 8 Vital Steps Grace In My Space
Related Posts