How to Paint Moldy Bathroom Ceiling Fan Covers: Essential Aspects
Many homeowners encounter the unsightly issue of mold growing on their bathroom ceiling fan covers. Mold can not only ruin the appearance of your bathroom but also pose health risks if not addressed promptly. To restore your fan covers to their original condition, painting them is a simple and effective solution. However, it's important to consider certain essential aspects to ensure a successful and long-lasting result.
Painting moldy bathroom ceiling fan covers requires careful attention to preparation and technique. This article will delve into the fundamental aspects of painting moldy bathroom ceiling fan covers, providing step-by-step instructions, essential materials, and valuable tips to achieve a professional finish.
### Essential Aspects of Painting Moldy Bathroom Ceiling Fan Covers1. Safety First
Before beginning any painting project, safety should be your utmost priority. Wear appropriate protective gear, such as gloves, goggles, and a mask, to prevent contact with mold spores and chemicals in the paint.
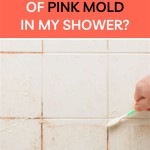
2. Cleaning and Mold Removal
Thoroughly clean the moldy ceiling fan covers using a bleach solution or a commercial mold cleaner. This step is essential to kill the mold and prevent it from reappearing. After cleaning, allow the covers to dry completely before painting.
3. Ventilation
Ensure adequate ventilation in the bathroom while painting. Open windows or use a fan to circulate air and prevent the accumulation of paint fumes. Proper ventilation will also help the paint dry faster.
4. Primer Selection
Use a primer specifically designed for mold-prone surfaces. This will create a barrier between the mold and the paint, preventing the mold from bleeding through the paint finish.
5. Paint Selection
Choose a mold-resistant paint in the desired color. Mold-resistant paints contain antifungal agents that inhibit the growth of mold. Consider using a semi-gloss or gloss finish as they are more resistant to moisture.
6. Painting Technique
Apply two or three thin coats of paint, allowing each coat to dry completely before applying the next. Use smooth, even strokes and avoid over-brushing. The multiple coats will provide better coverage and a more durable finish.
7. Maintenance
After painting, regular cleaning will help prolong the life of the paint finish. Use a damp cloth to wipe down the ceiling fan covers periodically to remove any moisture or dust that could contribute to mold growth.
Conclusion
By following these essential aspects, you can effectively paint moldy bathroom ceiling fan covers, restore their appearance, and improve the air quality in your bathroom. Remember to prioritize safety, thoroughly prepare the covers, use appropriate materials, and follow the painting technique carefully. With regular maintenance, you can enjoy a fresh and mold-free bathroom for years to come.

What Is The Best Way To Remove Mold From Bathroom Ceiling

I M A Pro Decorator And Have An Easy Way To Sort Mould On Ceilings It S All About The Right Paint Sun

I M A Pro Decorator And Have An Easy Way To Sort Mould On Ceilings It S All About The Right Paint Sun

How To Clean Bathroom Ceiling Fans Simple Method

Bathroom Ceiling Mold Removal When To Clean Call Branch Environmental

How To Paint Your Vent Covers Instead Of Paying Replace Them The Creek Line House

How To Paint Your Vent Covers Instead Of Paying Replace Them The Creek Line House

Bathroom Mold How To Identify And Get Rid Of In Environix

Home Dzine Bathrooms Quick Tip Get Rid Of Ceiling Mould

How To Prevent Mould On The Bathroom Ceiling Dbs Bathrooms
Related Posts