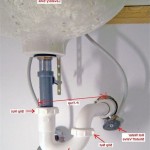
How to Put a New Sink in a Bathroom
Replacing a bathroom sink may seem like a daunting task, but it's actually a relatively simple project that can be completed in a few hours. With the right tools and materials, you can upgrade your bathroom's aesthetics and functionality in no time. Here's a step-by-step guide to help you get started:
Tools and Materials You'll Need:
- New bathroom sink
- Sink drain
- Pliers
- Adjustable wrench
- Putty knife
- Plumber's putty or silicone sealant
- Level
Step 1: Remove the Old Sink
Begin by turning off the water supply to the sink. Disconnect the supply lines from the shut-off valves and the drain pipe from the trap. Using a putty knife, carefully remove the old sink from the countertop. Be cautious not to damage the countertop or walls.
Step 2: Prepare the Drain
Inspect the drain hole and remove any debris. Install the new sink drain by tightening it clockwise until it is secure. Apply plumber's putty or silicone sealant around the rim of the drain to prevent leaks.
Step 3: Position the New Sink
Place the new sink on the countertop and align it with the drain hole. Use a level to ensure that the sink is level from side to side and front to back. Once the sink is positioned correctly, mark the outline of the sink on the countertop with a pencil.
Step 4: Apply Plumber's Putty
Roll out a rope of plumber's putty and place it around the rim of the sink's drain hole. The putty should be about ¼ inch thick and wide enough to extend slightly beyond the sink's rim.
Step 5: Install the Sink
Carefully lift the sink and place it over the drain hole, aligning it with the marks you made on the countertop. Press down on the sink to adhere it to the plumber's putty. Wipe away any excess putty that may have squeezed out.
Step 6: Tighten the Sink
Using the adjustable wrench, tighten the nuts on the bottom of the sink. Be sure not to overtighten, as this can crack the sink or damage the countertop. Reconnect the water supply lines to the shut-off valves and the drain pipe to the trap.
Step 7: Check for Leaks
Turn on the water supply and check for any leaks around the sink base or drain. If you find any leaks, tighten the nuts or apply additional plumber's putty or silicone sealant as needed.
Step 8: Finish the Installation
Once you're satisfied that there are no leaks, you can install the faucet and any other accessories. Clean up the work area and enjoy your newly installed bathroom sink!
By following these steps and taking the necessary precautions, you can easily and effectively replace a bathroom sink. Don't hesitate to embark on this project and give your bathroom a fresh, updated look!

How To Install A Bathroom Vanity

How To Fit A Bathroom Sink Diy Guides Victorian Plumbing

How To Install A Bathroom Sink Step By Guide

How To Install A Bathroom Vanity And Sink

Here S How Install A Bathroom Pedestal Sink


How To Install A Bathroom Sink Taskrabbit Blog

How To Remove And Replace A Bathroom Sink Diy

How To Install A Bathroom Sink Step By Guide

How To Replace A Bathroom Faucet Tinged Blue
Related Posts


