How to Re-Caulk a Bathroom Vanity
Re-caulking a bathroom vanity is a simple home improvement task that can make a big difference in the appearance of your bathroom. Over time, caulk can become discolored, cracked, or moldy, making your bathroom look unsightly. By re-caulking your vanity, you can restore its original beauty and prevent water damage.Materials
* Caulk * Caulk gun * Razor blade or utility knife * Rubbing alcohol * Rags * Painter's tape (optional)Instructions
1. Remove the old caulk. Use a razor blade or utility knife to carefully cut away the old caulk. Be careful not to damage the vanity or the countertop. 2. Clean the area. Wipe down the area where the old caulk was removed with rubbing alcohol. This will help to remove any dirt or debris that could interfere with the adhesion of the new caulk. 3. Apply painter's tape (optional). If you want to create a clean, straight line, you can apply painter's tape along the edges of the vanity and countertop. 4. Apply the new caulk. Load a caulk gun with a new tube of caulk. Cut the tip of the caulk tube at a 45-degree angle. Hold the caulk gun at a 45-degree angle to the surface and apply a continuous bead of caulk. 5. Smooth the caulk. Use your finger or a damp rag to smooth the caulk. Be sure to press the caulk into the joints between the vanity and the countertop. 6. Remove the painter's tape (optional). If you used painter's tape, remove it before the caulk dries. 7. Allow the caulk to dry. Allow the caulk to dry completely before using the vanity. The drying time will vary depending on the type of caulk you use.Tips
* Use a high-quality caulk that is specifically designed for bathrooms. * Apply the caulk in a continuous bead. Do not stop and start, as this will create a weak spot in the seal. * Smooth the caulk with your finger or a damp rag, rather than a tool. This will help to prevent the caulk from tearing. * Allow the caulk to dry completely before using the vanity. This will help to ensure that the seal is strong and watertight.
How To Re Caulk A Bathroom Sink Ifixit Repair Guide

How To Caulk Or Re A Vanity

How To Re Caulk A Sink

How To Clean Remove Reapply Caulk In Kitchens And Bathrooms

How To Caulk Like A Professional The Home Depot

How To Re Caulk A Bathroom Sink Ifixit Repair Guide

How To Caulk A Bathroom Sink 12 Steps With Pictures Wikihow

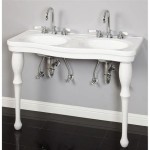
Score Caulk That Holds The Vanity Sink To Cabinet Small Bathroom Vanities Remodel Vintage

Should You Caulk Around A Bathroom Vanity Bathtubber

How To Re Caulk A Bathroom Sink Ifixit Repair Guide
Related Posts