How to Reface a Bathroom Vanity
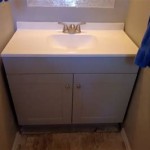
A bathroom vanity is a central element in any bathroom, offering storage and style. Over time, a vanity's finish can become outdated or damaged, requiring a refresh. Instead of replacing the entire vanity, consider refacing it. This cost-effective and relatively simple project can dramatically transform the look of your bathroom, giving it a modern and stylish appeal. This article will guide you through the process of refacing a bathroom vanity, offering step-by-step instructions and helpful tips.
Prepare the Vanity
Before diving into the refacing process, it's crucial to properly prepare the vanity. This ensures a smooth and long-lasting finish. Start by emptying the vanity of all contents, including drawers and cabinets. Remove the doors and hardware, taking care to label them for easy reinstallation. Clean the vanity's surface thoroughly with a mild detergent and a damp cloth, removing any dirt, grime, or residue. Allow it to dry completely before proceeding. If the vanity has existing damage, such as scratches or chips, it's essential to sand these areas smooth to create a uniform surface for the new finish.
Choose the Right Materials
The type of material you choose for refacing will significantly impact the final look and feel of your vanity. Here are some popular options to consider:
- Laminate: This cost-effective and durable option comes in a wide range of colors, patterns, and textures, offering a versatile choice for any bathroom style. It's easy to apply and maintain.
- Tile: For a luxurious and long-lasting look, consider tiling your vanity. Tiles offer endless possibilities for design, allowing you to create intricate mosaics or simple patterns. However, tiling requires more time and skill than laminating.
- Wood veneer: If you're looking for a natural and elegant finish, wood veneer is an excellent option. It offers the beauty of natural wood at a more affordable price than solid wood. However, applying veneer requires some woodworking skills and attention to detail.
- Paint: A simple and economical solution for a quick refresh, painting your vanity can transform its look drastically.
Carefully consider the desired aesthetic and budget when choosing the material. Consider visiting a local home improvement store or browsing online retailers for a wide range of materials and inspiration.
Refacing the Vanity
The refacing process will vary depending on the chosen material. Here are general guidelines for each option:
Laminate
1.
Measure and Cut:
Measure the vanity's surfaces and cut the laminate sheets to size using a utility knife and a straight edge. Ensure you leave a small overhang for a clean edge. 2.Apply Adhesive:
Apply construction adhesive to the back of the laminate sheets, using a notched trowel for even distribution. 3.Position and Press:
Position the laminate sheets on the vanity surfaces, carefully aligning them and pressing firmly to ensure a secure bond. 4.Trim and Finish:
Trim any excess laminate with a utility knife and finish the edges with a laminate edging tool or contact cement for a polished look. 5.Reinstall Hardware:
Reinstall the doors, hardware, and drawer pulls.Tile
1.
Prepare the Surface:
Clean the vanity surface and apply a bonding primer to promote adhesion with the mortar. 2.Install Backsplash:
If desired, install a tile backsplash for an updated and splash-resistant surface. 3.Apply Mortar:
Apply a thin layer of mortar to the vanity surface, using a notched trowel to create ridges for the tiles. 4.Position Tiles:
Carefully position the tiles over the mortar bed, ensuring they are level and evenly spaced. 5.Grout and Seal:
Once the mortar has dried, apply grout between the tiles, carefully wiping away any excess. Seal the grout to prevent staining and ensure a smooth finish.Wood Veneer
1.
Prepare the Surface:
Sand the vanity surface smooth and apply wood glue to the veneer sheets, ensuring even coverage. 2.Position and Press:
Position the veneer sheets on the vanity surface, carefully aligning them and pressing firmly to ensure good adhesion. 3.Clamp and Secure:
Use clamps to secure the veneer sheets in place, ensuring they are held down firmly. 4.Trim and Sand:
Once the glue has dried, use a sharp utility knife to trim any excess veneer. Sand the surface smooth with fine-grit sandpaper. 5.Finish:
Apply a sealant or finish to protect the veneer and enhance its natural beauty.Paint
1.
Prepare the Surface:
Thoroughly sand the vanity surface using a fine-grit sandpaper to create a smooth finish. Clean the surface with a damp cloth to remove dust and debris. 2.Prime:
Apply a primer suitable for bathroom surfaces, allowing it to dry completely before painting. 3.Paint:
Apply two coats of bathroom-grade paint, allowing each coat to dry completely before applying the next. Ensure you use a high-quality brush or roller for a smooth and even finish.Remember to consult the manufacturer's instructions for specific application techniques and drying times for the chosen materials. Always wear protective gear, such as gloves and a respirator, when working with adhesives, paints, or dust.
Refacing a bathroom vanity can be a rewarding and cost-effective way to refresh your bathroom’s style. By following these steps carefully and selecting the right materials, you can transform your outdated vanity into a stunning focal point in your bathroom.

Conquer Your Vanity Bathroom Cabinets Diy Cabinet Makeover

How To Reface A Bathroom Vanity Cabinet Dowelmax

Diy Cabinet Refacing Reface Supplies

Fluted Bathroom Cabinet Refacing Diy At Home With Ashley

4 Tips For Refacing Bathroom Vanity Doors Cabinet Now

How To Reface A Bathroom Vanity Cabinet Dowelmax

Fluted Bathroom Cabinet Refacing Diy At Home With Ashley

Refacing My Cabinets Bathroom Makeover Progress Budget Shaker Doors Pt 2

Bathrooms Refacing Kitchen Cabinets Bathroom Vanity Makeover Diy

Bathroom Cabinet Refacing Kitchen
Related Posts
