How to Refinish My Bathroom Sink
Is your bathroom sink looking a little worse for wear? Maybe the finish is chipped, or the color is outdated? Refinishing your bathroom sink is a great way to give it a fresh new look without having to replace it. And the best part is, it’s a relatively easy project that you can do yourself in a weekend.
Here’s a step-by-step guide on how to refinish your bathroom sink:
Materials You'll Need
- Cleaning supplies (dish soap, rubbing alcohol, rags)
- Sandpaper (120-grit and 220-grit)
- Primer specifically designed for bathroom fixtures
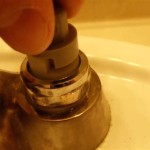
- Bathroom sink refinishing kit
- Gloves and a mask
Instructions
1. Clean the Sink
Start by cleaning the sink thoroughly with dish soap and water. Then, wipe it down with rubbing alcohol to remove any remaining dirt or grease. Allow the sink to dry completely.
2. Sand the Sink
Use 120-grit sandpaper to sand the entire surface of the sink, including the rim. Be sure to sand in a circular motion, and don’t apply too much pressure. Once you’ve sanded the entire sink, switch to 220-grit sandpaper and sand again to smooth out the surface.
3. Apply Primer
Apply a thin coat of primer to the entire surface of the sink, using a brush or roller. Allow the primer to dry completely according to the manufacturer’s instructions.
4. Apply the Refinishing Kit
Follow the instructions included in the refinishing kit to apply the refinishing material to the sink. Most kits will require you to apply multiple coats, allowing each coat to dry completely before applying the next. Be sure to wear gloves and a mask when applying the refinishing material.
5. Allow the Sink to Cure
Once you’ve applied the final coat of refinishing material, allow the sink to cure for the amount of time specified by the manufacturer.
6. Enjoy Your New Sink!
Once the sink is fully cured, you can start using it again. Enjoy your new, refinished bathroom sink!
Tips
- If you’re not sure what type of refinishing kit to use, consult with a professional.
- Be sure to read and follow the instructions included in the refinishing kit carefully.
- Allow plenty of time for the sink to dry and cure before using it again.
- If you’re not comfortable refinishing the sink yourself, you can hire a professional to do it for you.

How To Refinish Bathroom Vanity Top With Diy Resin Thediyplan

Paint Bathroom Vanity Countertop Sink So Easy A Piece Of Rainbow

Paint Bathroom Vanity Countertop Sink So Easy A Piece Of Rainbow

How To Paint A Sink Diy Bathroom Project Your Budget Will Love

How To Paint A Sink It All Started With

Transform Your Bathroom With Sink Paint The Honeycomb Home

How To Refinish Bathroom Vanity Top With Diy Resin Thediyplan

Transform Your Bathroom With Sink Paint The Honeycomb Home

How To Paint A Sink It All Started With

Easy Budget Sink Update Momhomeguide Com
Related Posts