Restoring the Radiance: A Guide to Refinishing Old Bathroom Sinks
Transforming an outdated bathroom sink into a gleaming centerpiece is a rewarding project that can revitalize your space. Refinishing an old sink not only enhances its aesthetics but also extends its lifespan, saving you costly replacements. Here's a comprehensive guide to help you achieve a perfect refinish:
1. Preparation: The Key to Success
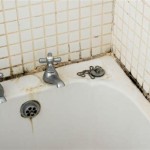
Meticulous preparation is paramount for a flawless refinish. Remove all fixtures, including faucets, drain, and overflow plates.Thoroughly clean the sink with a degreaser to remove any dirt, grime, or soap residue. Use fine-grit sandpaper to lightly sand the surface, creating a slightly rough texture for better paint adhesion.
2. Choose the Right Refinishing Kit
Various refinishing kits are available, each designed for specific sink materials. Select a kit that corresponds to your sink's composition, whether porcelain, acrylic, or cast iron. These kits typically include a cleaner, primer, paint, and a brush or roller.
3. Apply Primer and Paint
After cleaning and sanding, apply a thin layer of primer evenly over the sink's surface. Allow the primer to dry completely before applying the paint. Use a brush or roller to apply multiple thin coats of paint, waiting for each coat to dry before applying the next.
4. Drying and Curing
Adequate drying time is crucial for a durable finish. Follow the manufacturer's instructions for drying and curing times. Most refinishing kits require at least 24 hours or more before using the sink. During this period, keep the area well-ventilated and avoid touching or using the sink.
5. Reinstall Fixtures and Final Touches
Once the paint is completely cured, reinstall the fixtures. Reattach the faucet, drain, and overflow plates, ensuring a secure and leak-free fit. Apply a sealant around the base of the fixtures for added protection. Clean the sink with a mild detergent and water to remove any residual dust or debris, and your refinished bathroom sink is ready to shine again.
Additional Tips:
- For a glossy finish, use a high-gloss paint or apply a clear topcoat.
- To create a more durable finish, consider using an enamel-based paint.
- If you're refinishing a deeply damaged sink, consider using a patching compound to fill in cracks or chips before painting.
- Always test the refinishing kit in an inconspicuous area first to ensure compatibility and color accuracy.

Paint Bathroom Vanity Countertop Sink So Easy A Piece Of Rainbow

Resurfacing An Old Sink Diy Oak Hill Home Solutions

How To Refinish A Bathroom Vanity Bower Power

How To Refinish A Bathroom Vanity Bower Power

How To Paint Old Bathroom Countertop Vanity Sink Easy Gorgeous Transformation Before After

How To Refinish Bathroom Vanity Top With Diy Resin Thediyplan

How To Refinish Bathroom Cabinets Diy Domestic

Totally Transformed Updating An Old Bathroom Vanity Exquisitely Unremarkable

Refinishing A Wood Bathroom Vanity Part 1 Preparation Stripping

Sink Refinishing Mission Hills Ca