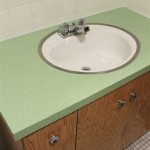
How To Remove A 2 Handle Bathroom Faucet
Replacing a bathroom faucet is a relatively simple task that can be completed in a few hours. By following these step-by-step instructions, you can easily remove your old faucet and install a new one.
Tools and Materials
- Adjustable wrench
- Channel-lock pliers
- Faucet puller tool (optional)
- Basin wrench (optional)
- Plumber's putty or silicone sealant
- New faucet
Step-by-Step Instructions
1. Turn Off the Water Supply
The first step is to turn off the water supply to your bathroom faucet. Locate the water shut-off valves under the sink and turn them clockwise until they are tight.
2. Remove the Aerator
If your faucet has an aerator, use a wrench or pliers to remove it. The aerator is the small screen that is attached to the end of the faucet spout.
3. Disconnect the Supply Lines
Use an adjustable wrench or channel-lock pliers to disconnect the supply lines from the faucet. The supply lines are the flexible hoses that connect the faucet to the water shut-off valves.
4. Loosen the Mounting Nuts
Use an adjustable wrench to loosen the mounting nuts that hold the faucet in place. The mounting nuts are located under the sink and are usually made of plastic or metal.
5. Remove the Faucet
Once the mounting nuts are loose, you can remove the faucet from the sink. Be careful not to damage the sink or countertop when removing the faucet.
6. Install the New Faucet
Apply a thin bead of plumber's putty or silicone sealant around the base of the new faucet. Then, insert the faucet into the sink and tighten the mounting nuts until they are snug.
7. Connect the Supply Lines
Connect the supply lines to the new faucet and tighten them until they are snug. Be sure to use a wrench or pliers to avoid overtightening the supply lines.
8. Turn On the Water Supply
Turn on the water shut-off valves under the sink and check for leaks. If there are any leaks, tighten the mounting nuts or supply lines until the leaks stop.
9. Install the Aerator
If your new faucet has an aerator, screw it onto the end of the faucet spout. Tighten the aerator until it is snug.
10. Test the Faucet
Turn on the faucet and check to make sure it is working properly. If the faucet is leaking or not working properly, check the connections and tighten them as needed.
Tips
- If you have a faucet puller tool, it can make removing the old faucet easier.
- If you have a basin wrench, it can make tightening the mounting nuts easier.
- Be careful not to overtighten the mounting nuts or supply lines.
- If you are not comfortable removing your old faucet yourself, you can hire a plumber to do it for you.

Tips Tricks Remove Delta 2 Handle 4 In Bathroom Sink Faucet With Bar 5 21 18

Replacing A Bathroom Faucet Fine Homebuilding

How To Remove A Bathroom Faucet

4 Easy Ways To Fix A Leaky Bathroom Sink Faucet With Double Handle

How To Install Replace A Bathroom Faucet

How Do I Replace My Moen Bathroom Faucet Cartridge

How Do I Replace Bathroom Sink Faucet Handles Cleaning More

Courant Lf 049 Copc 2 Handle 8 Widespread Bathroom Faucet Pfister Faucets

How To Fix Leaky Bathroom Handle Delta Faucet Model 4530 Series Hard Water

How To Fix A Bathroom Faucet 14 Steps


