How to Remove and Replace Bathroom Floor Tile
Upgrading your bathroom floor with new tiles can transform its look and feel. While it may seem daunting, removing and replacing bathroom floor tile is a manageable DIY project with the right tools and preparation. Here's a step-by-step guide to help you navigate the process:
Step 1: Safety First
Before you begin, ensure your safety by wearing proper protective gear, including gloves, safety glasses, and a respirator if necessary. Disconnect the power to the bathroom and turn off the water supply.
Step 2: Remove Fixtures and Trim
Remove all fixtures such as toilets, sinks, and vanities to clear the work area. Pry off any baseboards or molding around the perimeter of the room using a flat pry bar.
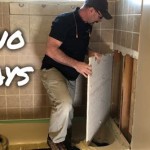
Step 3: Chip Away Old Tiles
Using a hammer and chisel, start chipping away the old tiles. Aim for the corners or edges of the tiles and work your way inward. Avoid using excessive force as you may damage the subfloor.
Step 4: Remove Thinset
Once the tiles are removed, use a scraper or putty knife to remove any remaining thinset (the adhesive used to bond the tiles). Be careful not to gouge or damage the subfloor.
Step 5: Inspect Subfloor
Inspect the subfloor carefully for any damage or rot. If the subfloor is in good condition, you can proceed with the new tile installation. If repairs are necessary, address them before moving forward.
Step 6: Lay Out New Tiles
Before applying thinset, lay out the new tiles dry on the subfloor to plan their placement. Adjust the spacing and alignment as needed.
Step 7: Apply Thinset
Using a notched trowel, spread thinset evenly over the subfloor in small sections. Be sure to follow the manufacturer's instructions for the type of thinset you are using.
Step 8: Set New Tiles
Carefully set the new tiles into the thinset, pressing them down firmly. Use spacers to maintain consistent grout lines. Check for level as you go to ensure a flat floor.
Step 9: Grout and Seal
Once the tiles are set, allow the thinset to cure for the recommended time. Then, apply grout to fill the joints between the tiles. Use a grout float to smooth the grout and remove any excess. After the grout has dried, seal it to protect it from moisture and staining.
Step 10: Reinstall Fixtures and Trim
Once the grout has cured, reinstall the fixtures, vanity, and any trim you removed earlier. Reconnect the power and water supply, and enjoy your newly tiled bathroom floor.
Tips for Success:
- Use sharp tools to ensure clean cuts and prevent damage to the floor.
- Wear knee pads for comfort while chipping away old tiles.
- Cover surrounding areas with plastic sheeting or drop cloths to protect them from debris.
- Let the thinset cure completely before grouting to avoid cracking.
- Allow ample time for the grout to dry and seal before using the shower or tub.

How To Remove A Tile Floor

How To Remove A Tile Floor

Easy Ways To Replace Bathroom Tiles With Pictures Wikihow

A Diy Guide To Removing Old Tile Flooring

How To Remove Replace One Bathroom Tile Ceramic Repair

How To Remove L And Stick Floor Tile A Erfly House

How To Upgrade Bathroom Tile Without Replacing

How To Lay Bathroom Tile 5 Easy Steps Rubi Blog Usa

How To Retile A Shower Floor Art Tile Renovation
.png?strip=all "How To Fix Loose Or Broken Ceramic Floor Tiles")
How To Fix Loose Or Broken Ceramic Floor Tiles
Related Posts