How to Remove and Replace Bathroom Wall Tile
Removing and replacing bathroom wall tile is a manageable DIY project that can significantly enhance a bathroom's aesthetic appeal and functionality. This detailed guide outlines the necessary steps and considerations for a successful tile replacement project.
Preparation and Safety Measures
Before commencing any demolition work, proper preparation and safety precautions are paramount. This includes ensuring the area is adequately ventilated, protecting adjacent surfaces, and wearing appropriate safety gear.
- Turn off the water supply to any plumbing fixtures within the work area.
- Cover the bathroom floor and any nearby fixtures with drop cloths or plastic sheeting.
- Wear safety glasses, a dust mask, work gloves, and hearing protection.
- Gather all necessary tools and materials before starting the project.
Removing Existing Tile
Removing the existing tile requires patience and a systematic approach to minimize damage to the underlying wall.
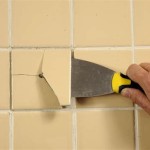
- Start by loosening a few tiles in a less conspicuous area, such as behind a door or near the floor, using a hammer and chisel or a pry bar.
- Once a few tiles are removed, a reciprocating saw with a carbide-tipped blade can be used to expedite the removal process.
- Hold the blade at a shallow angle to prevent gouging the wall surface.
- Work systematically in small sections to maintain control and minimize debris.
Removing Thinset and Preparing the Wall
After removing the tiles, the remaining thinset must be removed to provide a smooth, level surface for the new tile installation.
- Use a hammer and chisel or a rotary hammer with a chisel attachment to remove the hardened thinset.
- For stubborn thinset, a grinding wheel attached to an angle grinder can be effective.
- Inspect the wall for any damage, such as loose drywall or water damage. Repair any issues before proceeding.
- Apply a waterproof membrane to the wall if necessary, particularly in shower or tub surrounds.
Planning and Layout
Proper planning and layout are essential for a professional-looking tile installation. This involves measuring the wall area, calculating the required number of tiles, and determining the desired pattern.
- Measure the wall area to be tiled accurately.
- Calculate the number of tiles needed, adding 10-15% for cuts and waste.
- Dry-lay the tiles to ensure proper fit and to plan the layout, particularly around corners and fixtures.
- Establish a level horizontal line and a vertical plumb line as reference points for the first row of tiles.
Installing New Tile
Installing the new tile requires precision and attention to detail to achieve a visually appealing and structurally sound finished product.
- Mix the thinset mortar according to the manufacturer’s instructions.
- Apply a thin layer of thinset to a small section of the wall using a notched trowel.
- Place the first tile firmly against the wall, aligning it with the reference lines.
- Continue installing tiles, using tile spacers to maintain consistent grout lines.
- Periodically check the level and plumb of the installed tiles to ensure proper alignment.
Cutting Tiles
Cutting tiles accurately is crucial for a professional-looking installation, particularly around edges, corners, and fixtures.
- Measure and mark the tile accurately before cutting.
- Use a tile cutter for straight cuts or a wet saw for more complex cuts.
- For small, intricate cuts, tile nippers can be used.
- Smooth any rough edges with a tile file or sanding block.
Grouting and Finishing
Grouting fills the spaces between the tiles, providing a waterproof seal and enhancing the overall appearance.
- After the thinset has cured for the recommended time, remove the tile spacers.
- Mix the grout according to the manufacturer’s instructions.
- Apply the grout using a grout float, pressing it firmly into the joints.
- Remove excess grout with a damp sponge, wiping diagonally across the tiles.
- Allow the grout to haze over slightly, then buff the tiles with a clean, dry cloth.
- Apply a grout sealer to protect the grout from staining and moisture.
Clean Up
Once the grout has fully cured, the final step involves cleaning the newly tiled surface and disposing of any debris.
- Clean the tiles thoroughly with a damp sponge or cloth.
- Dispose of all construction debris properly.
- Reinstall any removed fixtures or fittings.

How To Remove Wall Tiles

How To Remove Replace One Bathroom Tile Ceramic Repair

Easy Diy Guide On Removing Tiles From Walls Fantastic Handyman Au

How To Renovate Bathroom Without Removing Tiles Multipanel

Tips On How To Remove Old Shower Tile Ugly Duckling House

How To Remove Tiled Shower Walls The Floor Elf

How To Remove A Tile Backsplash Homeserve Usa

Preparing Walls For Tiling Removing Old Tiles Bathroom Guru

How To Prep And Install Diy Bathroom Shower Tile Lowe S

Tips On How To Remove Old Shower Tile Ugly Duckling House
