How to Remove Bathroom Sink Drain Putty
Bathroom sink drains often have a layer of putty around them to create a watertight seal. Over time, this putty can become old, cracked, or even moldy. If you need to remove the putty to replace it or repair the drain, here's a step-by-step guide to help you do it safely and effectively.
Step 1: Gather Your Tools
You'll need a few tools to remove the bathroom sink drain putty:
- Putty knife
- Screwdriver
- Flashlight (optional)
- Rags or towels
Step 2: Turn Off the Water Supply
Before starting any work, it's important to turn off the water supply to the sink. Locate the shut-off valves under the sink and turn them clockwise until they're snug.
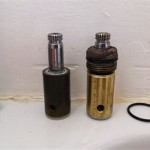
Step 3: Remove the Drain Cover
Using a screwdriver, unscrew the drain cover and remove it. This will expose the drain opening and the putty around it.
Step 4: Loosen the Putty
Insert the putty knife into the gap between the sink and the drain. Carefully pry the putty loose, working your way around the circumference of the drain. If the putty is particularly stubborn, you can use a flashlight to illuminate the area and help you see better.
Step 5: Remove the Old Putty
Once the putty is loose, you can use your fingers to pull it away from the drain. Be careful not to scratch the sink or damage the drain.
Step 6: Clean the Surface
Once the old putty is removed, use a damp rag or towel to wipe down the surface of the sink and the drain. This will remove any remaining putty residue and prepare the area for the new putty.
Step 7: Apply New Putty
Roll out a rope of new putty and place it around the drain. Press the putty into place, using your fingers or a putty knife to smooth it out. Make sure the putty is evenly distributed and creates a watertight seal.
Step 8: Reinstall the Drain Cover
Screw the drain cover back into place and tighten it snugly. Turn on the water supply and check for any leaks. If there are any leaks, you may need to adjust the putty or apply more.
Tips:
- For stubborn putty, you can use a heat gun or hair dryer to soften it before removing it.
- If the putty is moldy, wear gloves and a mask to protect yourself from spores.
- Use a non-abrasive cleaner to clean the sink surface and drain.

How To Use Plumber S Putty As Easy Playdough

How To Use Plumber S Putty Repair And Replace

How To Clean And Upgrade Bathroom Drain Stopper Or Pop Up

How To Replace A Sink Stopper Quick And Simple Home Repair

How To Replace A Sink Stopper Quick And Simple Home Repair

Bath Sink Drain Replacement

How To Replace A Drain In The Bathroom Sink Right Way

How To Install Bathroom Sink Drain Queen Bee Of Honey Dos

How To Use Plumber S Putty

The Comprehensive Guide To Plumber S Putty Mr Rooter Plumbing
Related Posts