How to Remove a Bathroom Vanity Backsplash
A bathroom vanity backsplash, also known as a backsplash tile, serves as a protective and decorative element between the sink and the wall. Over time, however, the backsplash may become outdated, damaged, or simply not to your taste. If you're looking to update the look of your bathroom or replace a damaged backsplash, here's a step-by-step guide to help you remove it safely and efficiently.
1. Gather Your Tools and Materials:
- Safety glasses
- Dust mask
- Utility knife
- Hammer
- Pry bar
- Putty knife
- Scraper
- Bucket
- Sponge or cloth
- Grout remover (if applicable)
- Plastic sheeting (optional)
2. Prepare the Area:
To protect your bathroom from dust and debris, lay down plastic sheeting or drop cloths around the vanity area. Cover any exposed pipes or fixtures to prevent damage.
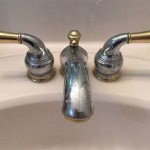
3. Remove Fixtures and Disconnect Utilities:
- Turn off the water supply to the sink.
- Disconnect the drainpipes from the sink.
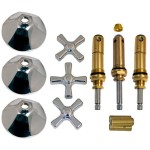
- Remove the sink faucet and any other fixtures attached to the backsplash.
4. Score the Grout (if applicable):
If the backsplash tiles are attached with grout, use a utility knife to score the grout lines. This will make it easier to remove the tiles later.
5. Apply Grout Remover (if applicable):
If the backsplash tiles are heavily grouted, apply a grout remover according to the manufacturer's instructions. This will help loosen the grout and make removal easier.
6. Pry Off the Backsplash Tiles:
Starting from a corner tile, use a pry bar to gently pry the tile off the wall. Be careful not to damage the wall surface underneath.
7. Remove Adhesive or Mortar:
Once the tiles are removed, use a putty knife or scraper to remove any remaining adhesive or mortar from the wall. Be thorough to ensure a clean surface for the new backsplash.
8. Clean the Surface:
Use a damp sponge or cloth to clean the wall surface thoroughly. Remove any dust, debris, or remaining adhesive residue.
9. Prepare for the New Backsplash:
If you're installing a new backsplash, make sure the surface is level and free of any imperfections. You may need to apply a leveling compound or make repairs to the wall before installing the new backsplash.
Removing a bathroom vanity backsplash can be a DIY project with the right tools and a careful approach. Remember to take safety precautions, work carefully, and prepare the surface properly for the new backsplash. If you have any doubts or the backsplash is extensively damaged, consider hiring a professional to ensure a safe and successful removal.

How To Remove A Dated Vanity Backsplash Young House Love

Removing The Side Splash Backsplash From Our Bathroom Sink Young House Love

How To Remove A Tile Backsplash Easily

Removing The Side Splash Backsplash From Our Bathroom Sink Young House Love

Removing The Side Splash Backsplash From Our Bathroom Sink Young House Love

Removing The Side Splash Backsplash From Our Bathroom Sink Young House Love

Removing The Side Splash Backsplash From Our Bathroom Sink Young House Love

How To Remove A Tile Backsplash Easily

How To Remove A Dated Vanity Backsplash Young House Love

How To Remove A Bathroom Vanity Budget Dumpster
Related Posts