How to Remove an Old Bathroom Vanity Light
Upgrading your bathroom vanity light is a relatively simple project that can dramatically change the look and feel of your space. Before you begin, it's important to ensure that you have the necessary tools and follow the safety guidelines for working with electricity.
Tools and Materials
* Screwdriver (Phillips and flathead) * Electrical tape * Wire cutters or strippers * Voltage tester * New vanity light fixture * Safety glassesSafety Guidelines
* Turn off the power to the vanity light at the circuit breaker or fuse box before starting any work. * Verify that the power is off using a voltage tester. * Wear safety glasses to protect your eyes from debris.Step-by-Step Instructions
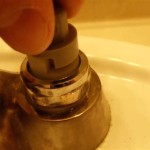
1. Detach the Globe and Back Plate
* Carefully remove the globe or shade from the vanity light fixture. * Locate the screws holding the back plate to the electrical box and remove them. * Gently pull the back plate away from the electrical box.2. Disconnect the Wires
* Inside the electrical box, you will see three or four wires: a black wire (hot), a white wire (neutral), and possibly a green or bare copper wire (ground). * Note the position of the wires and their connections. Use a flathead screwdriver or wire cutters to disconnect the wires from the terminals on the old vanity light. * Wrap electrical tape around the exposed ends of the wires to prevent electrical shock.3. Remove the Mounting Bracket
* Locate the screws or bolts holding the mounting bracket to the electrical box. * Remove the screws or bolts and gently pull the mounting bracket away from the electrical box.4. Discard the Old Fixture
* Once the wires and mounting bracket are disconnected, you can discard the old vanity light fixture.5. Prepare the New Fixture
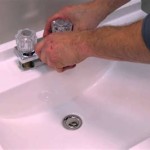
* Unpack the new vanity light fixture and lay out all the components. * If necessary, assemble the fixture according to the manufacturer's instructions.6. Install the New Fixture
* Feed the wires of the new fixture through the hole in the electrical box. * Align the mounting bracket of the new fixture with the electrical box and secure it with screws or bolts. * Connect the wires from the new fixture to the corresponding terminals in the electrical box. Ensure that the black wire connects to the black wire, the white wire connects to the white wire, and the ground wire connects to the green or bare copper wire. * Wrap electrical tape around the wire connections to secure them.7. Mount the Back Plate and Globe
* Place the back plate over the electrical box and secure it with screws. * Install the globe or shade on the vanity light fixture.8. Restore Power
* Turn the power back on at the circuit breaker or fuse box. * Test the vanity light to ensure it is working properly.Congratulations! You have successfully removed your old bathroom vanity light and installed a new one. Enjoy the updated look and improved functionality of your bathroom.

Replacing An Old Bathroom Light Young House Love

How To Replace A Bathroom Vanity Light Fixture

How To Change A Bathroom Light Fixture

Replacing A Light Fixture On Vanity Mirror

How To Replace A Hollywood Light With 2 Vanity Lights

Bathroom Lighting How To Replace A Vanity Light The Home Depot

Replacing A Light Fixture On Vanity Mirror

How To Install A Vanity Light And Electrical Box Chic Misfits

How To Change A Bathroom Light Fixture

How To Replace A Hollywood Light With 2 Vanity Lights
Related Posts