How To Remove Pfister Bathroom Sink Drain Effortlessly
Introduction:
Maintaining a bathroom sink in pristine condition often involves encountering scenarios that require disassembly, cleaning, or repair. Among these tasks, removing a Pfister bathroom sink drain might arise as a necessary step. Whether addressing a persistent clog, replacing an outdated drain, or performing routine maintenance, understanding the process of removing a Pfister bathroom sink drain is essential. This comprehensive guide will walk you through the steps involved in removing a Pfister bathroom sink drain efficiently and hassle-free.
Essential Tools:
To successfully remove a Pfister bathroom sink drain, gather the following tools:
- Adjustable Wrench: Choose a wrench with an adjustable jaw to accommodate various sizes of nuts.
- Pliers: Equip yourself with a pair of pliers to grip and manipulate components.
- Screwdriver: Acquire a flat-head screwdriver to remove screws securing drain parts.
- Bucket or Basin: Prepare a container to collect water and debris during the removal process.
- Flashlight or Work Light: For poorly lit areas beneath the sink.
- Gloves: Protect your hands from dirt and potential sharp edges.
- Cloth or Rags: Have a cloth or rags handy for wiping up water and debris.
Step-by-Step Guide:
With the necessary tools in hand, follow these steps to remove a Pfister bathroom sink drain:
1. Turn Off Water Supply:Locate the shutoff valve for the bathroom sink water supply. Typically, this valve is situated beneath the sink or behind the access panel, often labeled "hot" and "cold." Turn the valves clockwise to shut off the water supply completely.
2. Open Faucet:Turn on the bathroom sink's faucet to drain any remaining water from the faucet and drain. Allow all the water to drain completely before proceeding further.
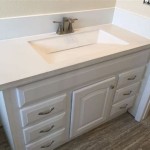
3. Access Drain Assembly:Locate the drain assembly directly beneath the sink. It is typically a cylindrical or dome-shaped component with a visible drain stopper. Ensure there is sufficient space beneath the sink to work comfortably.
4. Remove Stopper:Lift the drain stopper from the drain assembly by pulling it straight up. Be prepared for water to drip from the drain while removing the stopper. Wipe up any excess water using the prepared cloth or rags.
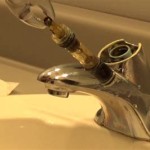
5. Disconnect Supply Lines:Using the adjustable wrench, locate and loosen the supply lines connected to the faucet. These lines are typically made of flexible metal or plastic and carry hot and cold water to the faucet. Loosen the nuts on the supply lines by turning them counterclockwise until they are hand-loose. Be cautious not to drop the nuts into the drain.
6. Disconnect Drain Trap:The drain trap is a curved pipe located beneath the drain assembly that prevents sewer gases from entering the bathroom. To disconnect the drain trap, place the bucket or basin beneath the trap to catch any remaining water and debris. Using the adjustable wrench, loosen the slip nuts connecting the drain trap to the drain assembly and the wall drain. Slowly detach the trap from the assembly and wall drain.
7. Remove Drain Assembly:Now, focus on the drain assembly itself. Using the pliers, grip the locking nut located beneath the drain assembly (accessible from underneath the sink). Turn the locking nut counterclockwise to loosen it and remove it completely. The drain assembly should now be free to detach from the sink. Carefully lift the drain assembly out of the sink, being mindful of any residual water or debris.
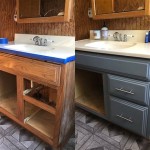
8. Clean and Inspect:Once the drain assembly is removed, take a moment to clean it thoroughly. Use a mixture of hot water and dish soap to remove dirt and grime, paying special attention to the strainer basket and any other removable components. Inspect the drain assembly for any signs of damage or wear and replace it if necessary.
9. Reassemble and Reconnect:After cleaning and inspection, reassemble the drain assembly and reconnect it to the sink. Ensure that all the components are properly aligned and secured. Tighten the locking nut underneath the sink until snug, but avoid overtightening to prevent damage. Reconnect the supply lines to the faucet and tighten the nuts securely.
10. Restore Water Supply:Finally, turn on the shutoff valves beneath the sink to restore the water supply to the bathroom sink. Open the faucet and let water run for a few minutes to check for any leaks. Repair any leaks by tightening the connections as needed.
Conclusion:
With careful attention to detail and a systematic approach, successfully removing a Pfister bathroom sink drain becomes an attainable task. By following the steps outlined in this guide, you can effectively address clogged drains, replace outdated drains, and perform necessary maintenance on your bathroom sink. Remember to prioritize safety by turning off the water supply before commencing the removal process and wearing protective gloves to safeguard your hands. Whether you're a seasoned DIY expert or tackling this project for the first time, the information provided here will empower you to remove a Pfister bathroom sink drain confidently and efficiently.

Lav Pop Up Drain Push Type

My Pop Up Drain Is Not Draining Water

My Pop Up Drain Is Not Draining Water

How To Remove A Bathroom Sink Stopper Take Out Pop Up Drain From

My Pop Up Drain Is Not Draining Water

Pfister Drain Clean

My Pop Up Drain Is Not Draining Water

My Pop Up Drain Is Not Draining Water

My Pop Up Drain Is Not Draining Water

How To Install A Push Seal Drain Pfister
Related Posts