Essential Aspects of Removing a Pfister Bathroom Sink Stopper
A clogged or damaged bathroom sink stopper can lead to a frustrating and unsanitary situation. Pfister, a reputable manufacturer of bathroom fixtures, offers a range of bathroom sink stoppers. However, like any mechanical component, these stoppers may require occasional removal for cleaning or replacement.
Removing a Pfister bathroom sink stopper may seem daunting, but it's a relatively straightforward task with the right approach. By following the steps outlined in this article, you can efficiently remove the sink stopper, addressing any underlying issues, and restoring your sink's functionality.
Required Tools:
- Adjustable wrench or pliers
- Cloth or paper towels
- Optional: Lubricating spray (WD-40 or similar)
Step-by-Step Guide:
1. Turn Off Water Supply:
Begin by turning off the water supply to the sink. Locate the shut-off valves beneath the sink and turn them clockwise to close.
2. Remove Drain Cover:
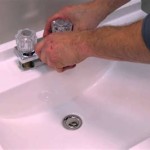
Using a cloth or paper towels, carefully remove the drain cover (pop-up assembly cap) that sits on top of the sink stopper.
3. Adjust Linkage:
Underneath the sink, locate the linkage that connects the drain lever to the stopper assembly. Using pliers or an adjustable wrench, loosen the linkage screw, allowing you to disconnect the linkage from the stopper.
4. Loosen Stopper Nut:
Use the adjustable wrench or pliers to loosen the stopper nut located directly beneath the sink. Turn it counterclockwise to loosen it.
5. Apply Lubricant (Optional):
If the stopper nut is particularly stubborn, you can spray some lubricating spray around the threads. This will help loosen any corrosion or buildup.
6. Remove Stopper:
With the stopper nut loosened, gently pull the stopper straight up to remove it from the sink.
7. Clean and Inspect:
Once the stopper is removed, take this opportunity to clean any debris or buildup from the stopper and the sink drain. Inspect the stopper for any damage or wear that may have contributed to the issue.
8. Replace and Reassemble:
If necessary, install a new stopper. Align the new stopper with the sink drain and push it down until it fits snugly. Hand-tighten the stopper nut securely. Reconnect the linkage to the stopper and tighten the linkage screw.
9. Turn On Water Supply:
Turn on the water supply to the sink and check for any leaks. If there are no leaks, the stopper has been successfully removed and reinstalled.
Additional Tips:
- If the stopper is persistently stuck, avoid excessive force. Consult a qualified plumber for assistance.
- Regular maintenance, such as cleaning the stopper and drain, can prevent future clogs and extend the life of your sink stopper.
- If you encounter any difficulties or have concerns, refer to the manufacturer's instructions or consult a professional plumber for guidance.

How To Remove A Bathroom Sink Stopper Take Out Pop Up Drain From

My Pop Up Drain Is Not Draining Water

Lav Pop Up Drain Push Type

My Pop Up Drain Is Not Draining Water

My Pop Up Drain Is Not Draining Water

My Pop Up Drain Is Not Draining Water

My Pop Up Drain Is Not Draining Water

Bathroom Sink Quick Fix How To Remove And Clean The Stopper Unclog Si Drain

How To Remove A Pfister Drain Stopper Hunker

Push Seal From Pfister
Related Posts