How to Remove an RV Bathroom Sink
Removing an RV bathroom sink can be a relatively straightforward task, but there are a few essential steps you should follow to ensure it's done correctly. Whether you need to replace a damaged sink or access the plumbing beneath, this guide will provide you with the necessary instructions and tips to safely and efficiently remove your RV bathroom sink.
Gather Your Tools and Materials
Before you begin, gather the following tools and materials:
- Adjustable wrench
- Phillips head screwdriver
- Flathead screwdriver (optional)
- Bucket or container
- Plumber's putty or silicone sealant (if necessary)
Disconnect the Water Supply
Locate the shutoff valves beneath the sink and turn them off. Open the faucet to release any remaining water in the lines. Use a bucket or container to collect any water that drains.
Disconnect the Drain
Remove the P-trap from the drain. You may need an adjustable wrench to loosen the nuts. If the P-trap is glued in place, you can carefully cut it away with a sharp knife or utility blade.
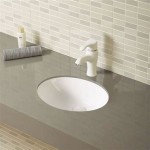
Remove the Sink Mount
Locate the screws or bolts that secure the sink to the countertop. Use a Phillips head screwdriver or wrench to remove them. If the sink is glued down, use a flathead screwdriver to carefully pry it loose.
Lift Out the Sink
Once the mount is removed, carefully lift the sink out of the countertop. If it's heavy, ask for assistance or use a support brace underneath. Inspect the old gasket or sealant around the drain hole and remove any residue.
Clean and Prepare the Surface
Before installing the new sink, thoroughly clean the countertop surface with a damp cloth and allow it to dry completely. Apply a new bead of plumber's putty or silicone sealant around the drain hole to create a watertight seal.
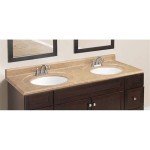
Reinstall the Sink
Carefully lower the new sink into place and align it with the drain hole. Press down firmly to secure it. Replace the mounting screws or bolts and tighten them securely.
Reconnect the Drain
Reattach the P-trap to the drain. Tighten the nuts securely, ensuring that the connections are leak-free.
Reconnect the Water Supply
Turn on the shutoff valves beneath the sink to reconnect the water supply. Slowly turn on the faucet and check for any leaks. Make any necessary adjustments to the connections.
Wrap Up
Congratulations on successfully removing your RV bathroom sink! If you followed these steps carefully, you should now have access to the plumbing or a new sink installed. Remember, if you encounter any difficulties or have any doubts, consult a qualified RV technician for guidance.

How To Squeeze More Space Out Of A Tiny Rv Bathroom Artofrv Com

How To Squeeze More Space Out Of A Tiny Rv Bathroom Artofrv Com

Rv Bathroom Sink Replacement

Replacing The Rv Bathroom Sink How To Or Not

How To Squeeze More Space Out Of A Tiny Rv Bathroom Artofrv Com

Replacing The Rv Bathroom Sink How To Or Not

How To Squeeze More Space Out Of A Tiny Rv Bathroom Artofrv Com

How Not To Replace An Rv Bathroom Faucet

How To Squeeze More Space Out Of A Tiny Rv Bathroom Artofrv Com

Rv Bathroom Faucet Replacement John Marucci On The Road
Related Posts