How to Remove Water Line from Bathroom Sink
Removing water lines from bathroom sinks is a straightforward task that any homeowner can handle with a few basic tools and a little bit of time. Whether you're replacing a leaky faucet, installing a new sink, or simply need to repair a damaged water line, it's important to know how to remove it safely and correctly.
To remove the water line from your bathroom sink, you will need the following tools:
- Adjustable wrench
- Phillips head screwdriver
- Bucket or bowl
- Rags
- New water lines (if necessary)
Once you have gathered your tools, follow these steps to remove the water line from the bathroom sink:
- Turn off the water supply. The first step is to shut off the water supply to the sink. This is typically done by locating the shut-off valves beneath the sink and turning them clockwise until they are fully closed.
- Disconnect the water supply lines. Once the water supply is turned off, you can disconnect the water supply lines from the sink. To do this, use an adjustable wrench to loosen the nuts that connect the water lines to the faucet. Be careful not to over-tighten the nuts, as this can damage the faucet or the water lines.
- Remove the faucet. If you are replacing the faucet, you will need to remove it before you can remove the water lines. To do this, use a Phillips head screwdriver to remove the screws that hold the faucet in place. Once the screws are removed, you can lift the faucet off of the sink.
- Remove the old water lines. Once the faucet is removed, you can remove the old water lines. To do this, simply pull the water lines out of the holes in the sink.
- Clean the sink. Before you install the new water lines, it is a good idea to clean the sink. This will help to prevent any dirt or debris from getting into the new water lines.
- Install the new water lines. Once the sink is clean, you can install the new water lines. To do this, simply feed the water lines through the holes in the sink and connect them to the faucet. Be sure to tighten the nuts that connect the water lines to the faucet, but do not over-tighten them.
- Turn on the water supply. Once the new water lines are installed, you can turn on the water supply. Check for any leaks and tighten the nuts if necessary.
That's it! You have now successfully removed the water line from your bathroom sink. This is a simple task that can be completed in just a few minutes with the right tools and a little bit of know-how.

How To Replace A Bathroom Faucet Tinged Blue

Replace Bathroom Sink Water Supply Lines

How To Replace A Faucet Water Supply Line Install Fluidmaster S Seal

4 Ways To Replace A Bathroom Sink Wikihow

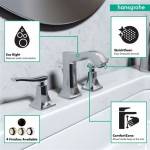
How To Remove And Install A Bathroom Faucet

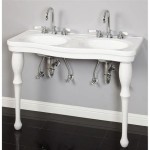
How To Fit A Bathroom Sink Diy Guides Victorian Plumbing

How To Replace A Bathroom Faucet Home Repair Tutor

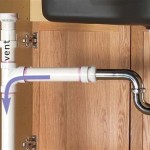
How To Install A Pipe From Sink Drain Wall Ehow

6 Ways To Fix Clogged Drains Keep Pipes Flowing Freely Horizon Services

How To Replace A Sink Stopper Quick And Simple Home Repair
Related Posts