How to Replace a Bathroom Exhaust Fan Light
Maintaining proper ventilation in bathrooms is crucial for preventing excess moisture, mold growth, and unpleasant odors. A key component of bathroom ventilation is the exhaust fan light, which helps remove moisture and improve air quality. Replacing a bathroom exhaust fan light is a relatively simple task that can be completed in a few steps.
This article will guide you through the essential aspects of replacing a bathroom exhaust fan light, including:
- Safety precautions
- Removing the old fan light
- Installing the new fan light
- Electrical considerations
- Testing the new fan light
Before starting, ensure you have the necessary tools, including a screwdriver, electrical tape, and a ladder if needed. Always follow safety precautions and turn off the electricity before working on any electrical components.
Safety Precautions
Before replacing the fan light, turn off the power supply to the bathroom at the electrical panel. This will prevent any electrical accidents. Wear gloves and safety glasses to protect yourself from dust and debris.
Removing the Old Fan Light
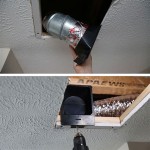
Locate the screws that secure the fan light to the ceiling or wall and remove them. Carefully detach the fan light assembly from the electrical box or housing. Disconnect the electrical wires by unscrewing the wire nuts and separating the wires. Note the position of each wire for reconnecting later.
Installing the New Fan Light
Align the new fan light assembly with the electrical box and secure it using the screws. Reconnect the electrical wires by twisting the corresponding wire ends together and securing them with wire nuts. Ensure the wires are securely connected and properly insulated.
Electrical Considerations
Bathroom exhaust fans typically require a 120-volt electrical connection. Ensure the circuit breaker or fuse supplying power to the fan is rated for the fan's amperage. Use electrical tape to insulate all wire connections and protect them from moisture.
Testing the New Fan Light
Turn on the power supply at the electrical panel and test the fan light. Ensure the fan is operating smoothly and quietly. Check if the light is working properly. If any issues arise, recheck the electrical connections and ensure everything is secure.
Replacing a bathroom exhaust fan light is a straightforward task that can improve bathroom ventilation and enhance the overall functionality of the space. By following the steps outlined in this article, you can safely and effectively replace your fan light and ensure proper moisture control and air quality in your bathroom.

Install A New Bathroom Vent Fan Light The San Fernando Valley Sun

How To Clean Replace Light Broan Model 678 Exhaust Fan

How To Remove Nutone Bathroom Fan Light Cover 2024 Guide Home Inspector Secrets

How To Install A Bath Exhaust Fan

How To Replace A Bathroom Fan Light Doityourself Com

Update An Existing Bathroom Exhaust Fan Cover Remodelaholic

How To Replace Your Bathroom Exhaust Fan Light Bulb Step By Homelyville

How To Open This Bathroom Exhaust Fan Replace Light Bulb Doityourself Com Community Forums

How To Replace An Exhaust Fan Motor Ace Hardware

Installing An Exhaust Fan During A Bathroom Remodel Greenbuildingadvisor
Related Posts


