How to Replace a Glacier Bay Bathroom Faucet Cartridge
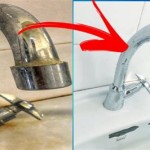
Bathroom faucets can become worn out over time, leading to leaks, drips, and other issues. The cartridge, a crucial component within the faucet, is often the culprit behind these problems. If you have a Glacier Bay bathroom faucet experiencing such malfunctions, replacing the cartridge might be the solution you need. This guide will walk you through the process of replacing a Glacier Bay bathroom faucet cartridge, providing clear instructions and tips to ensure a smooth and successful replacement.
1. Gathering Supplies and Preparing for Replacement
Before embarking on the replacement process, it's essential to gather all the necessary supplies and prepare the work area. This includes:
- New faucet cartridge: It's crucial to obtain the correct replacement cartridge compatible with your Glacier Bay model. Check the manufacturer's website or consult the user manual for the specific cartridge part number.
- Adjustable wrench: This tool will be used to loosen and tighten the faucet's nuts and other components.
- Channel-lock pliers: These pliers will come in handy for gripping and removing stubborn components.
- Phillips-head screwdriver: This tool is required to dislodge the handle from the faucet.
- Small basin or bucket: This is for collecting water that may drain from the faucet during the process.
- Towel: Use a towel to protect the countertop and surrounding area from water and debris.
- Optional: A pair of gloves to protect your hands during the process.
Once you have gathered the required tools, the next step is to shut off the water supply to the faucet. Locate the shut-off valve for the bathroom sink, usually beneath the sink or on the wall, and turn it fully clockwise to stop the water flow.
To avoid potential damage to the faucet, open the faucet to drain any remaining water. This will prevent pressure buildup within the system. After draining the faucet, dry the surrounding area with your towel.
2. Removing the Old Cartridge
With the water supply shut off and the area drained, you are ready to remove the old cartridge. This is a straightforward process involving the following steps:
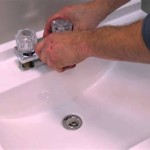
- Remove the faucet handle: Using the Phillips-head screwdriver, remove the screws securing the handle to the faucet body. Carefully pull the handle off.
- Remove the decorative cap or escutcheon: Depending on your faucet model, there may be a decorative cap or escutcheon covering the cartridge's location. Use your fingers or a small tool to gently pry it off.
- Remove the retaining nut: Beneath the cap or escutcheon, you will find a nut that secures the cartridge to the faucet body. Use the adjustable wrench to hold the faucet body and the channel-lock pliers to carefully loosen and remove the nut.
- Remove the old cartridge: Once the retaining nut is removed, the old cartridge should come out easily. If it's stuck, gently wiggle it with your fingers or a small tool to dislodge it.
As you remove the components, pay attention to their order and position. This will help you reassemble the faucet correctly later. Carefully inspect the old cartridge to identify any signs of wear or damage, which might have caused the faucet's malfunction.
3. Installing the New Cartridge
With the old cartridge removed, you can now install the new one. This process is essentially the reverse of removal, but it is essential to ensure proper alignment and secure installation:
- Insert the new cartridge: Gently insert the new cartridge into the faucet body, ensuring that it aligns correctly with the faucet's internal mechanisms.
- Tighten the retaining nut: Using the adjustable wrench, hold the faucet body and carefully tighten the retaining nut back onto the cartridge. Do not overtighten as it could damage the cartridge or faucet body.
- Replace the escutcheon or cap: Reinstall the decorative cap or escutcheon over the cartridge, ensuring it sits securely and aligns correctly.
- Replace the handle: Align the handle with its mounting position and secure it to the faucet body using the screws removed earlier.
Before turning the water supply back on, check that the faucet's handle operates smoothly and that the cartridge is securely installed.
4. Testing and Final Steps
The final step involves restoring the water supply and testing the faucet for leaks or other issues. After replacing the cartridge and ensuring all parts are properly installed, slowly turn the water supply back on by turning the shut-off valve counterclockwise.
Carefully test the faucet by turning it on and off several times. Check for any leaks around the cartridge area, the handle, or at the faucet's spout. If you notice any leaks, immediately shut off the water supply and re-inspect the installation process to identify and fix any issues.
Once you are satisfied with the faucet's performance and there are no leaks, you can consider cleaning up any remaining debris or water from the surrounding area.

Glacier Bay Shower Cartridge Replacement Old Style

How To Replace The Cartridge On A Glacier Bay Leaky Faucet

How To Change A Glacier Bay Bathroom Faucet Cartridge Diy Home Repair

How To Replace The Cartridge On A Glacier Bay Leaky Faucet

How To Replace Glacier Bay Shower Cartridge Instructions

How To Fix A Glacier Bay Shower In 10 Minutes

How To Fix A Glacier Bay Shower In 10 Minutes

Glacier Bay Cartridge Change

Glacier Bay Single Handle Tub And Shower Cartridge Assembly 864660 The Home Depot

Danco Cartridge For Glacier Bay Single Handle Faucets 10321 The Home Depot
Related Posts