How To Replace A Kohler Bathroom Faucet
Replacing a Kohler bathroom faucet is a relatively simple task that can be completed in about an hour with the right tools and materials. Here are the steps on how to do it:
Tools and Materials Required:
- Adjustable wrench - Basin wrench or pliers - Phillips screwdriver - Flathead screwdriver - New Kohler bathroom faucet - Plumber's putty - Teflon tapeStep 1: Turn Off the Water Supply
Before you start, turn off the water supply to the faucet by closing the shut-off valves under the sink. If there are no shut-off valves, you will need to turn off the main water supply to the house.
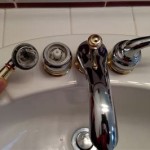
Step 2: Remove the Old Faucet
Use the adjustable wrench to loosen the nuts that hold the faucet in place. Once the nuts are loose, you can use your hands to remove the faucet from the sink.
Step 3: Clean the Sink Surface
Once the old faucet is removed, clean the surface of the sink where the new faucet will be installed. Remove any old plumber's putty or Teflon tape.
Step 4: Apply Plumber's Putty
Apply a bead of plumber's putty around the base of the new faucet. This will help to seal the faucet and prevent water from leaking.
Step 5: Install the New Faucet
Place the new faucet in the sink and tighten the nuts that hold it in place. Use the adjustable wrench to tighten the nuts until they are snug, but do not overtighten them.
Step 6: Connect the Water Lines
Connect the hot and cold water lines to the new faucet. Use the basin wrench or pliers to tighten the nuts that hold the water lines in place. Wrap Teflon tape around the threads of the water lines before tightening the nuts to help prevent leaks.
Step 7: Turn On the Water Supply
Turn on the water supply to the faucet and check for leaks. If there are any leaks, tighten the nuts that hold the water lines in place until the leaks stop.
Step 8: Install the Handle
Install the handle on the faucet. Use the Phillips screwdriver to tighten the screw that holds the handle in place.
Step 9: Test the Faucet
Turn on the faucet and test it to make sure that it is working properly. Check for any leaks and make sure that the water temperature is correct.
Conclusion
Replacing a Kohler bathroom faucet is a simple task that can be completed in about an hour with the right tools and materials. By following these steps, you can easily replace your old faucet and give your bathroom a fresh, updated look.

Kohler Wide Spread Taboret Lavatory Faucet Stems Replaced

How To Remove And Install A Bathroom Faucet

Kohler Rubicon Battery Powered Touchless Single Hole Bathroom Faucet In Vibrant Brushed Nickel K R32928 4d Bn The Home Depot

Kohler K 10272 4 Bn Forte Widespread Bathroom Faucet With Build Com

Kohler Sundae 4 In Centerset 2 Handles Bathroom Faucet Matte Black K R28796 4d Bl The Home Depot

Kohler Ealing Vibrant Brushed Nickel Single Hole 4 In Centerset 1 Handle Watersense Bathroom Sink Faucet With Drain And Deck Plate The Faucets Department At Com

Kohler 10215 4 Cp Forte Single Hole Bathroom Faucet With Metal Pop Up Drain Assembly In Polished Chrome Af Supply

Kohler Transitional Single Hole Bathroom Faucet Costco

How To Install Kohler Sink Faucet Kitchen Infinity

How To Remove Kohler Bathroom Faucet Handle Melted Stories