Replacing a Bathroom Basin Set: A Comprehensive Guide
Upgrading your bathroom basin set can dramatically enhance the aesthetics and functionality of your space. Whether you're a seasoned DIY enthusiast or a first-time handyman, replacing a basin set is a relatively straightforward task. Follow these detailed instructions to achieve a professional-looking result.
Tools and Materials Required:
- Adjustable wrench
- Pliers
- Screwdriver
- Basin wrench or strap wrench
- New basin set with fittings
- Plumber's putty or silicone sealant
- Teflon tape
- Replacement drain stopper and lift rod (optional)
Step 1: Safety First
Before beginning, turn off the water supply to the bathroom basin. Open the faucet to release any remaining water in the pipes.
Step 2: Disconnect the Old Basin
Use an adjustable wrench to loosen the nuts that secure the water supply lines to the faucet. Disconnect the lines and remove them from the faucet. Next, use a basin wrench or strap wrench to loosen the nuts that hold the basin to the countertop. Once loosened, carefully lift the basin off the countertop and place it on a protected surface.
Step 3: Prep the New Basin
Apply a generous bead of plumber's putty or silicone sealant around the rim of the drain hole on the underside of the new basin. This will create a watertight seal when installed.
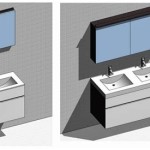
Step 4: Install the New Basin
Lift the new basin and carefully place it over the drain hole in the countertop. Align the basin with the countertop and press down firmly to compress the putty or sealant. Tighten the nuts that hold the basin in place, but avoid overtightening.
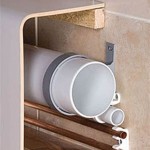
Step 5: Reconnect the Water Supply Lines
Wrap a few turns of Teflon tape around the threads of the water supply lines. Reconnect the lines to the faucet and tighten the nuts securely using an adjustable wrench.
Step 6: Install the Drain Assembly
Place the drain stopper into the drain hole and secure it with the retaining nut. Attach the lift rod to the drain stopper and connect it to the lever on the faucet body. Ensure the drain assembly is properly seated and tight.
Step 7: Finishing Touches
Turn on the water supply and check for leaks. If any leaks occur, tighten the nuts further. Clean up any excess putty or sealant and enjoy your newly installed bathroom basin set.
Tips:
Use a level to ensure the basin is installed evenly.
Tighten all nuts securely, but avoid overtightening.
If the nuts are difficult to loosen, apply penetrating oil to the threads.
Consider replacing the drain stopper and lift rod for a matching and updated look.

How To Fit A Bathroom Sink Diy Guides Victorian Plumbing

How To Easily Replace Basin Taps Step By

How To Replace Or Fit Basin Taps Lever Plumbing Tips

How To Replace Basin Taps Fit

How To Fit A Bathroom Sink Diy Guides Victorian Plumbing

How To Change Or Replace Single Bathroom Basin Tap

How To Replace Bathroom Taps Big

How To Install A Bathroom Sink Step By Guide

How To Change Bathroom Taps Everything You Need Know

How To Remove And Replace A Bathroom Sink Diy