How to Replace a Bathroom Faucet Cartridge
The faucet cartridge is a crucial component that controls the flow and temperature of water in your bathroom faucet. A faulty cartridge can lead to leaks, dripping, and other problems, making it essential to replace it promptly. This article delves into the essential aspects of replacing a bathroom faucet cartridge, guiding you through the process with step-by-step instructions.
1. Identifying the Faucet Type
Before replacing the cartridge, it's vital to determine the type of faucet you have. Common types include single-handle, dual-handle, and widespread faucets. Each type has its own unique cartridge design, so identifying it correctly is essential for compatibility.
2. Gathering Tools and Materials
To replace the cartridge, you'll need a few basic tools: a screwdriver, adjustable wrench, pliers, and a replacement cartridge compatible with your faucet. It's also helpful to have a small bucket or towel to catch any water that may leak during the process.
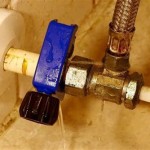
3. Shutting Off Water Supply
Safety first! Before starting any work, shut off the water supply to the faucet by closing the shut-off valves located under the sink. If there are no valves, you may need to turn off the main water supply to your home.
4. Removing the Faucet Handle and Trim
Depending on your faucet type, you may need to remove the handle and trim pieces to access the cartridge. For single-handle faucets, use a screwdriver to remove the handle's cap or set screw and slide the handle off. For dual-handle faucets, use pliers to remove the handle's retainer nut and lift the handle off.
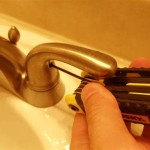
5. Unscrewing and Removing the Cartridge
Once the handle is removed, you'll see a cartridge nut that holds the cartridge in place. Use an adjustable wrench to carefully unscrew the cartridge nut. Pull the cartridge straight out of the faucet body. If it's stuck, you may need to use pliers to gently wiggle it loose.
6. Cleaning and Installing the New Cartridge
Before installing the new cartridge, clean the faucet body where the cartridge sits. Use a damp cloth or a mild cleaning solution to wipe away any debris or old sealant. Insert the new cartridge straight into the faucet body and align it correctly. Hand-tighten the cartridge nut as much as possible.
7. Reassembling the Faucet
Now that the new cartridge is in place, start reassembling the faucet. Replace the handle and trim pieces by sliding them back onto the faucet body. Tighten any screws or nuts securely. Finally, turn the water supply back on and check for leaks.

Bathroom Faucet Cartridge Replacement

Fixing Faucets How To Replace A Difficult Tub Faucet Cartridge

Bath Tub Cartridge Replacement Ifixit Repair Guide

How To Replace Leaky Cartridges In A Bathroom Faucet Repair

Gerber How To Install A Cartridge

Replace Bathroom Faucet Cartridge Doityourself Com Community Forums

Replacing A Faucet Cartridge Elkay S Step By Guide

Bathroom Faucet Cartridge Replacement

Bath Tub Cartridge Replacement Ifixit Repair Guide

How To Replace Leaky Cartridges In A Bathroom Faucet Repair