How to Replace a Bathroom Sink Mixer Tap
Replacing a bathroom sink mixer tap is a relatively simple DIY project that can be completed in just a few hours. By following these step-by-step instructions, you can save yourself the cost of hiring a plumber.
Tools and Materials You'll Need:
- New mixer tap
- Wrench
- Adjustable spanner
- Plumbers' putty
- Teflon tape
- Bucket
- Cloth
Step 1: Turn Off the Water Supply
Start by turning off the water supply to the sink. There will usually be two valves under the sink, one for hot water and one for cold water. Turn both valves clockwise until they are fully closed.
Step 2: Disconnect the Old Tap
Use the adjustable spanner to loosen the nuts that connect the old tap to the water supply lines. Be careful not to overtighten the nuts, as this could damage the water lines.
Once the nuts are loose, you can disconnect the water supply lines from the tap. Be sure to catch any water that spills out into the bucket.
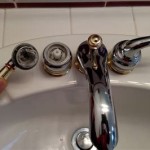
Step 3: Remove the Old Tap
Once the water supply lines are disconnected, you can remove the old tap. There will typically be two bolts that hold the tap in place. Use the wrench to loosen these bolts and then lift the tap off the sink.
Step 4: Prepare the New Tap
Before installing the new tap, you will need to apply plumbers' putty to the base of the tap. This will help to create a watertight seal between the tap and the sink.
Once the plumbers' putty is applied, you can wrap the threads of the water supply lines with Teflon tape. This will help to prevent leaks.
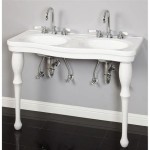
Step 5: Install the New Tap
Place the new tap on the sink and align it with the holes for the water supply lines. Then, tighten the bolts that hold the tap in place.
Once the tap is secure, connect the water supply lines to the tap. Be sure to tighten the nuts until they are snug, but do not overtighten them.
Step 6: Turn On the Water Supply
Once the new tap is installed, turn on the water supply to the sink. Check for any leaks around the tap. If you see any leaks, tighten the nuts until the leak stops.
Step 7: Clean Up
Once the new tap is installed and working properly, clean up any mess that you made. Wipe down the sink and the surrounding area with a cloth.
Congratulations! You have successfully replaced your bathroom sink mixer tap.

How To Replace Bathroom Taps Big

How To Replace A Lever Tap

How To Change Or Replace Single Bathroom Basin Tap

How To Change Bathroom Taps Everything You Need Know

Replacing A Bathroom Faucet Fine Homebuilding

Steps For How To Change A Mixer Tap Bathware Direct

How To Fit A Basin Mixer Tap Victoriaplum Com

How To Replace A Bathroom Faucet Removal And Installation

Diy How To Replace A Bathroom Sink Faucet Remove Install

How To Easily Replace Basin Taps Step By
Related Posts