How to Replace Bathroom Wall Taps
Replacing bathroom wall taps may seem like a daunting task, but with careful planning and some basic tools, it can be easily accomplished. Here's a step-by-step guide to help you get the job done.
Tools and Materials:
- Adjustable wrench
- Allen key (hex key)
- Screwdriver
- New wall taps
- Plumbers tape
- Pipe jointing compound
- Bucket
- Cloth or sponge
Step 1: Turn Off the Water Supply
Locate the isolation valves below the sink or in an access panel. Turn the valves clockwise to shut off the hot and cold water supply to the taps.
Step 2: Open the Taps
Open the hot and cold taps to release any remaining water in the pipes. Keep them open until no more water flows out.
Step 3: Remove the Old Taps
Using the adjustable wrench, loosen the nuts connecting the taps to the water pipes. Be careful not to overtighten or damage the pipes. Once loose, remove the nuts and disconnect the taps.
Step 4: Remove the Tap Handles
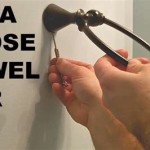
Locate the set screws or grub screws holding the tap handles in place. Use the appropriate Allen key or screwdriver to remove the screws and detach the handles.
Step 5: Clean the Wall Plate
Use a cloth or sponge to clean the wall plate where the new taps will be installed. Remove any dirt, debris, or old sealant.
Step 6: Install the New Taps
Apply a thin layer of plumbers tape to the threads of the new taps. Insert the taps into the wall plate and hand-tighten the nuts until snug.
Step 7: Tighten the Taps
Using the adjustable wrench, further tighten the nuts until they are secure. Avoid overtightening, as this can damage the taps or pipes.
Step 8: Reattach the Tap Handles
Align the tap handles with the hot and cold taps. Insert the set screws or grub screws and tighten them using the Allen key or screwdriver.
Step 9: Turn On the Water Supply
Slowly turn on the isolation valves to restore the water supply to the taps. Check for any leaks around the nuts or tap handles.
Step 10: Adjust the Taps
Operate the hot and cold taps to ensure they turn smoothly. Adjust the tap handles as necessary to ensure they are aligned correctly and do not hit the wall.
Tips:
- If you encounter any difficulty removing the old taps, use a penetrating oil to loosen the nuts.
- Apply pipe jointing compound to the threads of the new taps for extra sealing.
- Use a level to ensure the taps are installed straight.
- If you are not comfortable working with plumbing, it is recommended to contact a qualified plumber for assistance.

How To Install Wall Mounted Bathroom Faucet

Try It Yourself Replacing Wall Mounted Bath Taps

How To Fix A Leaking Bathtub Faucet Diy Family Handyman

How To Install Wall Mounted Bathroom Faucet

How To Install A Bathroom Faucet The Home Depot

How To Renew Bath Taps Shower Mixer Giving You A Free

Diy How To Replace A Bathroom Sink Faucet Remove Install

How To Replace A Bathtub Spout Diy Family Handyman

Faucet Repair How To A Leaky Shower

How To Service A Spindle Tap

