How To Replace a Glacier Bay Bathroom Faucet Cartridge
Glacier Bay faucets are a common fixture in many bathrooms. Over time, the faucet cartridge, a crucial internal component controlling water flow and temperature, can wear out, leading to leaks, drips, or difficulty adjusting water temperature. Replacing the cartridge is a relatively straightforward DIY project that can restore your faucet's functionality.
Before beginning any plumbing work, it is essential to turn off the water supply. Locate the shut-off valves under your sink. Turn both the hot and cold water valves clockwise until they stop. Turn on the faucet to release any remaining water pressure in the lines.
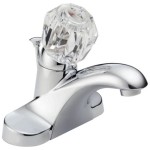
Next, identify the type of Glacier Bay faucet you have. Different models use different cartridges. Knowing the model number will help you purchase the correct replacement cartridge. The model number is usually found on the original packaging or sometimes stamped on the faucet itself. If you cannot locate the model number, taking a picture of the faucet to a hardware store can assist in identifying the correct cartridge.
Once you have the correct replacement cartridge, gather the necessary tools. These typically include a flathead screwdriver, Phillips head screwdriver, an adjustable wrench, and possibly pliers. Having a small container or towel handy can catch any residual water.
The handle removal process varies depending on the faucet model. Some Glacier Bay faucets have a setscrew located under the handle cap. This cap can usually be pried off with a flathead screwdriver. Once the cap is removed, loosen the setscrew using a Phillips head screwdriver or an Allen wrench, depending on the screw type. The handle can then be pulled off.
Other Glacier Bay models might have a handle secured by a clip or a retaining nut. If a retaining nut is present, use an adjustable wrench to loosen and remove it. Be careful not to scratch the finish of the faucet while using the wrench.
After removing the handle, you will likely find a decorative escutcheon or trim plate. This can usually be unscrewed by hand or gently pried off with a flathead screwdriver. Be cautious not to damage this piece, as it is often difficult to replace.
With the handle and trim removed, the cartridge retaining nut is exposed. This nut secures the cartridge to the faucet body. Use an adjustable wrench to carefully loosen and remove the retaining nut. The cartridge can then be pulled straight out of the faucet body.
Examine the O-rings on the old cartridge. If they appear damaged or worn, they should be replaced. New O-rings usually come with the replacement cartridge. If not, they can be purchased separately. Lubricating the O-rings with plumber's grease can help ensure a proper seal and prevent future leaks.
Insert the new cartridge into the faucet body, ensuring it is oriented correctly. The alignment tabs on the cartridge should match the slots in the faucet body. Secure the cartridge by tightening the retaining nut with an adjustable wrench. Do not overtighten, as this could damage the cartridge or the faucet body.
Reinstall the trim plate and handle, reversing the steps used for removal. Ensure the handle is aligned correctly and operates smoothly. Tighten the setscrew or retaining nut, securing the handle in place.
Once the faucet is reassembled, turn the water supply back on slowly. Check for leaks around the base of the handle, the spout, and the connections under the sink. If any leaks are detected, tighten the connections or disassemble the faucet to check for proper seating of the cartridge and O-rings.
Test the faucet by running both hot and cold water. Ensure the water temperature adjusts smoothly and that the handle operates correctly. If the faucet functions as expected, the cartridge replacement is complete.
While replacing a Glacier Bay faucet cartridge is a manageable DIY project, complex plumbing issues might necessitate professional assistance. If you encounter difficulties or are unsure about any step, consulting a qualified plumber is recommended.

How To Replace The Cartridge On A Glacier Bay Leaky Faucet

Glacier Bay Shower Cartridge Replacement Old Style

How To Change A Glacier Bay Bathroom Faucet Cartridge Diy Home Repair

How To Fix A Glacier Bay Shower In 10 Minutes

How To Fix A Glacier Bay Shower In 10 Minutes

How To Replace The Cartridge On A Glacier Bay Leaky Faucet

Glacier Bay Cartridge Change

Glacier Bay Single Handle Tub And Shower Cartridge Assembly 864660 The Home Depot

Danco Cartridge For Glacier Bay Single Handle Faucets 10321 The Home Depot

Glacier Bay Single Handle Tub And Shower Cartridge Assembly 864660 The Home Depot
Related Posts


