Essential Aspects of Replacing a Valve Under a Bathroom Sink
A leaky faucet can be a nuisance, not only wasting precious water but also potentially causing damage to your bathroom. While it may seem like a daunting task, replacing the valve under a bathroom sink is a relatively simple plumbing repair that can be completed in a few easy steps. In this guide, we will cover the essential aspects of how to replace a valve under a bathroom sink.
Identifying the Valve Type
The first step is to identify the type of valve under your bathroom sink. There are two main types of valves:
1. Compression valves use a washer to create a seal against the valve seat, stopping the flow of water.
2. Cartridge valves contain internal seals that move up and down to control water flow.
To determine your valve type, look for a packing nut or cap on top of the valve body. If there is a packing nut, you likely have a compression valve. If there is a cap, you likely have a cartridge valve.
Gathering Necessary Tools
Once you have identified the valve type, gather the necessary tools for replacement. For compression valves, you will need a wrench, flathead screwdriver, and replacement washer. For cartridge valves, you will need a wrench, pliers, and a replacement cartridge.
Shutting Off Water Supply
Before beginning any work, it is crucial to shut off the water supply to the sink. Locate the water shut-off valves under the sink and turn them clockwise to close.
Removing the Old Valve
To remove a compression valve, loosen the packing nut using a wrench. Then, remove the handle by unscrewing the screw and pulling it off. Finally, remove the valve stem by turning it counterclockwise. To remove a cartridge valve, use pliers to loosen the cap on top of the valve body. Then, pull out the cartridge by hand.
Installing the New Valve
To install a compression valve, insert a new washer into the valve stem. Then, screw the valve stem back into the valve body. Tighten the packing nut using a wrench. To install a cartridge valve, insert the new cartridge into the valve body. Align the tabs on the cartridge with the notches in the body. Push the cartridge in firmly and tighten the cap.
Reattaching the Handle and Escutcheon
Once the new valve is installed, reattach the handle by screwing it onto the valve stem and tightening the screw. Replace the escutcheon (the decorative plate around the valve) by aligning it with the holes on the sink and tightening the screws.
Testing the Valve
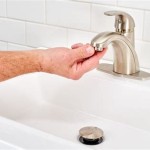
Before using the sink, test the valve by turning the water supply back on and running the faucet. Check for any leaks or drips. If there are any problems, adjust the packing nut or cartridge as needed.
By following these steps, you can successfully replace a valve under a bathroom sink and restore your faucet to proper working order. Remember to shut off the water supply before beginning any repair and always use caution when working with plumbing.

How To Replace A Leaking Shutoff Valve Under Sink

How To Replace Shutoff Valve Under Bathroom Sink

How To Install Water Shut Off Valve For Sinks

Replace Bathroom Sink Shut Off Valve

How To Replace Shutoff Valve Under Bathroom Sink

How To Replace A Shutoff Valve Diy Family Handyman

How To Replace A Leaking Shutoff Valve Under Sink

How To Replace A Flowtite Push Pull Valve With Standard Shut Off For Dishwasher

Handle Broke Off On Shut Valve Under Sink Diy Plumbing Repair Bathroom

Condo Blues How To Replace Plumbing Valves Without Soldering
Related Posts