How To Rough In Plumbing For Bathroom Vanity
Roughing in plumbing for a bathroom vanity involves installing the water supply and drain lines before the walls are closed up. This process requires careful planning and execution to ensure proper functionality and prevent future problems. Accurate measurements and adherence to local plumbing codes are essential.
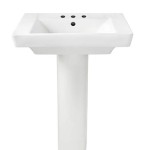
Planning and Preparation: Begin by determining the vanity's location and dimensions. Consult the manufacturer's specifications for the exact placement of the faucet and drain. Mark these locations on the wall and floor. Consider the type of vanity; a pedestal sink, for example, will have different requirements than a vanity with a cabinet. Verify local plumbing codes for specific requirements regarding pipe size, venting, and trap configurations.
Water Supply Lines: The standard height for vanity water supply lines is 20 inches from the finished floor. However, this can vary based on the vanity design. Measure carefully to ensure the lines align with the faucet connections. Typically, ½-inch copper or PEX piping is used for supply lines. Shut off the main water supply before beginning any plumbing work. Cut the supply lines to the appropriate length and install shutoff valves for both hot and cold water. Cap the lines temporarily to prevent debris from entering.
Drain Line Installation: The drain line for a vanity typically requires a 1 ½-inch PVC pipe. The drain pipe should be installed with a slight slope (¼-inch per foot) towards the main drain line to ensure proper drainage. Use appropriate fittings, such as sanitary tees and elbows, to connect the drain pipe to the main stack. Ensure all connections are secure and properly glued. Install a P-trap, which creates a water seal to prevent sewer gases from entering the bathroom. The P-trap should be located as close to the vanity drain as possible. The distance between the trap and the vent should not exceed the limits specified in the local plumbing code.
Vent System: Proper venting is crucial for preventing slow drainage and sewer gas backups. The vent pipe typically connects to the drain line near the P-trap and runs vertically to the roof. The size of the vent pipe is determined by the diameter of the drain line and the distance from the fixture to the main vent stack. Consult local plumbing codes for specific requirements regarding vent pipe sizing and placement. Ensure all vent connections are properly sealed.
Testing the System: Once all the plumbing is in place, it's crucial to test the system for leaks and proper drainage. Turn the water supply back on and check all connections for leaks. Fill the sink with water and then let it drain. Observe the drainage to ensure it flows freely. If any leaks or drainage issues are detected, address them immediately.
Wall and Floor Considerations: Depending on the wall and floor construction, specific considerations might be necessary. For example, if installing plumbing in a concrete slab floor, ensure the pipes are properly secured and protected. When running pipes through wall studs, drill holes large enough to allow for pipe movement and insulation. Use appropriate pipe hangers or straps to secure pipes to framing members. Notching or drilling studs excessively can weaken the structure, so consult building codes for allowable modifications.
Working with Different Materials: While copper and PVC are common materials, other options like PEX are becoming increasingly popular. PEX is flexible and easier to install in tight spaces. When connecting dissimilar materials, use appropriate transition fittings to ensure compatibility and prevent corrosion. Always follow manufacturer's recommendations for specific materials and connections.
Accessibility Considerations: When planning bathroom plumbing, consider accessibility requirements, especially if designing for individuals with disabilities. This might involve installing grab bars, adjusting the height of the vanity, or providing adequate clearance around the fixtures. Consult the relevant accessibility guidelines for specific requirements.
Preventing Future Issues: Properly installed plumbing is crucial for preventing future problems. Ensure all connections are tight and secure. Use appropriate materials and follow manufacturer's instructions. Regularly inspect the plumbing for leaks or other issues. Consider installing access panels to allow for easy access to plumbing components for future maintenance or repairs.
Professional Consultation: While this information provides a general overview of roughing in plumbing for a bathroom vanity, it's essential to consult local plumbing codes and potentially seek advice from a licensed plumber. A professional plumber can assess the specific requirements of your project and ensure the installation complies with all regulations and best practices. They can also address any unforeseen challenges that may arise during the process.

How To Plumb A Bathroom With Multiple Plumbing Diagrams Hammerpedia

A Vessel Sink Conversion Fine Homebuilding

Rough In Plumbing Bathroom Dimensions Jim The Home Guy

Quick Guide To Bathroom Sink Plumbing Rough In Heights Phyxter Home Services

Double Bathroom Sink Two Diffe Rough Plumbing Drain Methods

Installing A Vanity Bathroom Vanities Bath Installation Kitchen And The Edge How To Install

Rough In Plumbing Bathroom Dimensions Jim The Home Guy

Pin On Bathroom Remodeling

Installing A Vanity Bathroom Vanities Bath Installation Kitchen And The Edge How To Install

Master Bath Plumbing Question Diy Home Improvement Forum
Related Posts