How to Tighten a Single Handle Bathroom Sink Faucet
Maintaining a functional bathroom sink is essential for a comfortable daily routine. A loose or leaky faucet can be not only inconvenient but also wasteful, leading to increased water consumption and potential damage to your bathroom fixtures.
Tightening a single handle bathroom sink faucet is a relatively straightforward task that requires basic tools and a bit of know-how. By understanding the essential aspects of this process, you can effectively resolve this issue and restore the proper operation of your sink.
Essential Aspects of Tightening a Single Handle Bathroom Sink Faucet
Before attempting to tighten your faucet, it is essential to gather the necessary tools, including an adjustable wrench or a pair of pliers, a screwdriver, and a faucet wrench or a pair of locking pliers. Additionally, it is advisable to have a towel or a bowl handy to catch any dripping water during the process.
The steps involved in tightening a single handle bathroom sink faucet typically include:
- Turn off the water supply: Shut off the valves beneath the sink or the main water supply to prevent water from flowing while you work.
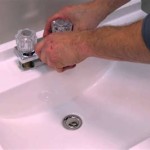
- Remove the handle: Use a screwdriver to remove the cap or set screw that secures the handle. Once loose, gently pull the handle straight up to detach it from the faucet.
- Tighten the packing nut: Use the adjustable wrench or pliers to turn the packing nut located underneath the handle clockwise. Tighten the nut until the handle feels secure, but avoid overtightening as it can damage the faucet.
- Reinstall the handle: Align the handle and slide it back onto the faucet. Secure it with the cap or set screw using a screwdriver.
- Turn on the water supply: Turn on the valves beneath the sink or the main water supply to allow water to flow through the faucet.
- Check for leaks: Inspect the faucet for any leaks. If you notice any dripping, tighten the packing nut further or replace the O-rings if necessary.
By following these steps carefully, you can effectively tighten a single handle bathroom sink faucet, ensuring its proper operation and preventing any potential water damage.

How To Fix A Leaky Single Handle Sink Faucet

How To Tighten Faucet Handle Homeserve Usa

How To Fix A Faucet Tighten Kitchen Sink Handle

How To Fix A Leaky Single Handle Sink Faucet

How To Tighten A Bathroom Faucet Handle

How To Tighten Moen Bathroom Faucet Handle Bargain

How To Repair A Single Handle Kitchen Faucet Diy Family Handyman

How To Fix A Leaky Bathroom Sink Faucet

How To Rebuild A Delta Single Handle Faucet

How To Replace Repair A Leaky Moen Cartridge In Bathroom Set Of Faucets Single Lever Tips
Related Posts