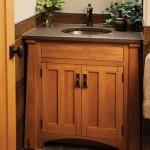
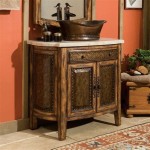
How to Turn a Chest into a Bathroom Vanity
Upcycling old furniture into new bathroom fixtures is a great way to add character and style to your bathroom while saving money. One of the most popular upcycling projects is turning a chest into a bathroom vanity. Here are the essential steps to help you get started:
1. Find a suitable chest
Start by finding an old chest or dresser that has the right dimensions for your bathroom. Look for pieces that are made of solid wood and have sturdy construction. Avoid chests that are too narrow or short, as they won't be able to accommodate a sink and faucet. The height of the chest should be around 30-34 inches, which is a typical height for bathroom vanities. You can find suitable chests at thrift stores, flea markets, or online marketplaces.
2. Prepare the chest
Once you have chosen the chest, you need to prepare it for its new role as a bathroom vanity. Start by removing any hardware, such as handles and knobs. Then, sand the entire surface of the chest to remove any paint or finish. If the chest is made of unfinished wood, you can skip this step. Once the chest is sanded, you can apply a primer to help the new finish adhere better.
3. Install the sink
The next step is to install the sink. Choose a sink that is the right size and shape for the chest. The sink should be made of a durable material such as porcelain or ceramic. To install the sink, you will need to cut a hole in the top of the chest. The hole should be slightly smaller than the sink so that the sink can be securely fitted into place.
4. Install the faucet
Once the sink is installed, it's time to install the faucet. Choose a faucet that is the right style for your bathroom and that has the appropriate number of holes for your sink. To install the faucet, you will need to drill holes in the top of the chest and the sink. The holes should be large enough to fit the faucet's mounting bolts.
5. Finish the chest
Once the sink and faucet are installed, you can finish the chest to your liking. You can paint or stain the chest to match your bathroom décor. You can also add decorative hardware to give the chest a personal touch. Once the finish is dry, your new bathroom vanity is complete!
Additional Tips:
- If you are not comfortable with the DIY aspect of this project, you can hire a professional to help you.
- Use a sealant around the sink and faucet to prevent water damage.
- Add storage baskets or drawers to the chest to keep your bathroom essentials organized.
- Enjoy your new, unique bathroom vanity!

How To Make A Dresser Into Vanity Tutorial An Oregon Cottage

Turn A Vintage Dresser Into Bathroom Vanity

A Pro Renovator S 6 Tips For Turning Dresser Into Bathroom Vanity
/103058794-9279662b921c41259cb908f3cb19acd9.jpg?strip=all)
How To Turn An Old Dresser Into A Beautiful Bathroom Vanity

Stunning Bathroom Tour Dresser Into Double Vanity

Repurposed Dresser Converted To Bathroom Vanity Reinvented Delaware

Repurposed Dresser Converted To Bathroom Vanity Reinvented Delaware

Mid Century Dresser Into Vanity Bright Green Door

Monday Makeover 7 Tips For Turning A Dresser Into Bathroom Vanity My Old Country House

How To Turn A Dresser Into Bathroom Vanity
Related Posts


